TOGA – Treadle On Gathering Academy Continued

I am still feeling the wondrous day I had last Saturday at TOGA.  I have posted once about this and in case you missed that post you can catch up with more details by clicking here.

I have stitched a gob on my little featherweight.  And I must say my expensive embroidery machine is now being retired for only FMQ as I am THAT impressed with the stitching on this 70 year old machine!  It is the perfect piecing machine.  I have North East Texas TOGA to thank for that.  I purchased this machine on Valentines day and did not want to sew on it until I was sure it was oiled/greased.  I am glad I waited.  It is true perfection.  Thank you TOGA for giving me the courage and the right information for this job.  I am a hands on kind of girl and I am still reeling from this a week later.  Total awe readers, I am still in total awe.

Where to begin?  How about with more of last weeks adventure in Lone Oak, Tx?  I will delve a bit into the classes I attended.  All of these classes gave away freebies.  For instance, in Dorise’s class you could make a sewing neck caddy, Brilliant!

doriseThis is a handy thing, especially if your set up goes from room to room like mine.  Always extra footsteps because you forgot the blasted scissors in the other room.  This would solve that problem with scissors snapping to one end and a pin and pincushion built into the other.  A tape measure with a clear vinyl window around the neck….you will never have to hunt down the cloth measuring tape again.

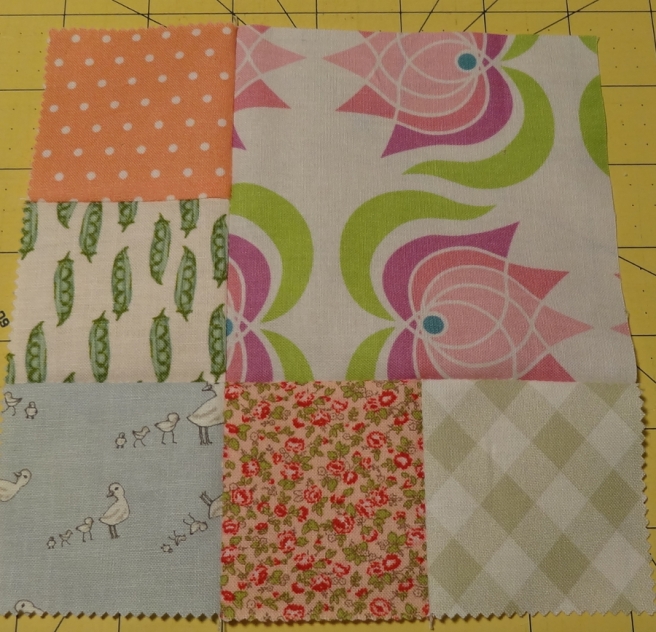
And Anna gave a class on making block boards.  What is a block boards you might ask?  They are pieces of foam board you purchase at the dollar store cut to various sizes with batting glued to the surface with a pretty fabric edge, a small design wall.  She also figured out you can use washi tape.  If you are doing blocks with lots of pieces like dear jane, you probably need to craft one of these up.  I had seen these before but never understood why……Anna made me understand.  I feel so in the know now!  Thank you Anna!

annablockboardsmyblockboard

Incidentally this board is almost standing straight up.  None of my wrinkly fabrics are falling off…..GENIUS!

Dianne gave a class showing how to make a quick bag.  This bag can be put on a potted plant to dress it up and give as a gift.  Cute little tute.

dianne

Dianne is centrally located in this picture wearing black.  Janet was wise cracking sitting next to her, slapping her hand on the table.  Janet decided this bag would make a perfect goofy hat.  She was right.  Janet you are such a goof!

janet

This was probably the funnest class as everyone had high energy and was in playful mood.  Dianne also gave a tutorial on making continuous bias binding as well and making the magic eight half square triangle method.

Just look what Dianne made with hers!  A Scrappy beautiful star!

dianneandkay

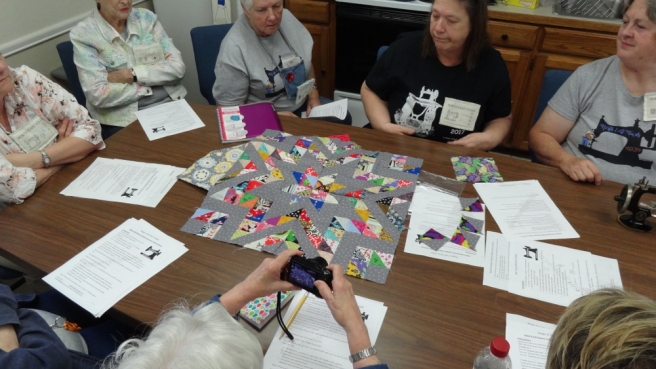
Seated on the other side of Dianne is Kay.  Kay reminded me of someone, but I can’t put my finger on it.  I either know her from somewhere, or I know someone with the same awnry glint in her eye.  She was a hoot, and a valuable asset to TOGA.  I suspect Kay did a lot behind the scenes that I know nothing about.  I did not know one person could have sew much personality.  I liked her instantly!

I attended a skrinky dink class, do you remember these from the 70s and 80s?  Well guess what they are totally customize-able today.  You can purchase the sheets either clear or white at the craft store.  Using a rubber stamp and ink with permanent sharpies, you can write, color, stamp, anything you want on a piece of plastic and shrink it down to dog tag size.  These were the examples she showed us.  Something I would not necessarily be interested in on my own, but am glad for the experience because this would be a great craft for a rainy day with the kiddos.  Thank you sew much for re-introducing an old technology with new customize-able goodness!

shrinkydinks

woodenbase

I saw this machine while at TOGA.  I am not sure if this is a 99k or a 15.  Not a sewing machine expert (it is a hand crank!).  Someone made a wooden extension and a nice little pin cushion.  This machine stood out from the others, too neat!

There was a parade with float goodness, yeah can you believe it at a sewing machine retreat?!  This year there were only two entries.  Both winners!  The way the parade works, the machines are decorated like floats and moved to an area so that you can parade by them.  You would then vote on your favorite float.

parade1.JPG

This parade float was decorated like a cake with the 100 year old hand crank sewing machine at the top, and all the notions around.  I was in awe I got to stand that close to a celebrity.  You are probably wondering who the celebrity is?  Why, the sewing machine of course.  This sewing machine was used probably before electricity was delivered to homes.  This machine has seen the great depression, and still stitches on.  Pretty damn amazing if you ask me!  (By the way, this float won the competition)

And second runner up went to the toy machine.  The set up is too cute!

parade2

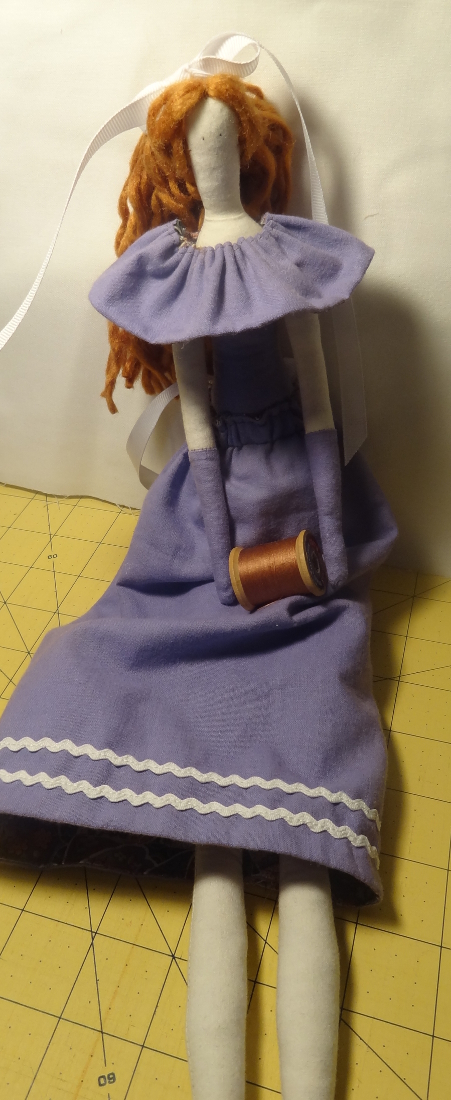
There was a toy doll along with the sewing machine in the pull toy.  Very playful!

dinner

The dinner line!  Chow is ready!  We had a marvelous smoked beef brisket, potato salad, catalina salad, rolls, chicken, barbecue sauce, cole slaw, and cookies.  I was stuffed.  (Pssst….they fed us and it was free if you attended, that is what I call hospitality!)

And then on to the raffle of garage sale items.  Everyone attending brought in their stuff from around the house they did not want any more.  I gave a quilters pounce and some patterns.  If there was something you saw you liked, you purchased tickets and put your name on the back of the tickets.  Tickets were drawn out of the bowl.  If your name was called you went up and helped yourself to one item.  When it got down to hardly anything left but utter junk, my name was called and I didn’t have any tickets in the bowl!  A couple of gals saw me standing empty handed and went up to the tables and grabbed a scarecrow and a needle point loom.  The needle point loom has facinated my oldest daughter and is no in her arsenal of the toy box.  (one man’s trash is another man’s treasure eh?)

And at the very end, they raffled off the quilt.  Beautiful!  This was all stitched by the Crankies of Greenville Texas on old treadles.  And here seated in front of the quilt is Vonnie.  She has easter egg hair!  Her egg hair represents her colorful personality.   I enjoyed sitting and chatting with her.  Another person I will not forget, there seemed to be alot of those here.  Normally I am really bad with remembering names.  But these people were so memorable!

quiltraffle

The quilt was won! …..not by me 😦

The woman who won the quilt, cried, which turned my eye faucets on too.  It was going to the perfect home.  She was so happy she won, I was so happy for her.  Yet more visible love!  I can’t wait for the next TOGA!

After attending TOGA, I kind of got the fever…..the fever to own another vintage machine!  So I purchased one.  It is being shipped now.  If I cannot get it to power on and make the plugs and cords work, I will figure out a way to make it a hand crank and show up next year with something extra special.  I can’t wait to show it to you!

In the meantime, I have been practicing with my tatting shuttle.  I had a hard time with allowing the cord to be able to adjust last weekend.  I figured out what I was doing wrong.  After making a picot, I was not closing the stitch properly.  I visited Gina Butlers channel on you tube and slowly but surely and making progress with a bunch of practice.  I have almost used up all of my shuttle thread and will be seeking out more because sitting down and doing this is very relaxing after a hard days work.  (Even more relaxing than quilting—whoa I would never have guessed I would even type those words).

I have also been working on more TOGA blocks that I modified two corners of.  I almost have all of my rows done.  I still need to incorporate the swap blocks and will probably not alter those and make those around the outer perimeter of the quilt.  I have also been trimming down HSTs left over from using the folded corners ruler.  I am linking up with quiltingismorefunthanhousework.blogspot.com for the oh scrap linky party!

spoolsworktatting1tatting2triimmings1trimmings2

Jeez, have I left anything out?  Probably, but then you would not have any thing to look forward too in my next post!  Thanks for reading and have a great weekend!


North East Texas T.O.G.A (Treadle-On Gathering Academy

Yesterday I had the joy and privilege to attend the North East Texas TOGA in Lone Oak, TX.  TOGA stands for Treadle-On Gathering Academy.  This group is about vintage machines, hand cranks, treadles, keeping them pristine, running, oiled, used, and loved!  This event consisted of many vintage machines (some of which I will probably never see again in my lifetime), vast knowledge, networking, freebies, live tutorials, great people, and GOOD food, with a cooking lesson thrown in as well.

I will be posting several posts in the coming days to cover all the goings on.  This first post is all about the doctors of vintages machines.  These people are true gems!  Walking sewing machine encyclopedias!  I am in awe and will be that way for quite sometime.  I got the opportunity to be seated in the first cleaning class on Saturday with Dr Margaret Snow, vintage machine guru!

She reminds me of my Aunt Ruby, I instantly liked her!  Here we are sitting at the table learning our lessons on maintenance for normal sewing conditions.  How to oil, where to oil, where the grease should be, and where to add more if needed.  How to clean the funk out.  How to take a machine that was froze up, and oil it, with a bit of patience, get it going again.  Three of us had various old singers, there was one beautiful vintage white.

dr snow

Pictured above…..Here is a machine that to my understanding was a problem child.  Not sure if they got it going, but it is an old hand crank.  Just look at those beautiful decals.  This is Dr Snow.  I would call her Dr Extraordinaire!

cleaning lesson

Pictured in the blue shirt is Gina.  She taught me how to tat on Saturday.  More on that later.  Here is the old White that would not sew before the cleaning class.  The featherweight machine sitting on its flywheel is Rusty’s.

Those of us in the cleaning lesson who had featherweights, it was a quick class.  These machines for the most part were well taken care of by those who valued their dollar enough to automatically take care of them.  So 70 years after manufacture, they just need a little dusting off and out.  A squeeze of oil here and there.  Thank all of you before me in this country.  You really valued your own hard work, built things to last, and made an heirloom to pass down.  Sewing machines, no matter how expensive today will probably not last 70 years.  Made in Japan….maybe…..made in China….hell no!

cleaning complete

I was done with the class and moved onto the learning room while Gina worked away with her old White Rotary.  Sometime after leaving, I meandered into the second cleaning class.  Gina was still there, diligently, and waiting patiently for everything to be back together again.  I got a tear in my eye when I wandered up and saw that old machine working!  I see in Gina’s lap Dr. Snow’s book.  She discussed this book a bit.  An encyclopedia of sewing machines.  A rare book written by a chap in Hawaii.  If you ever come across this book, we were instructed to buy it.  They will fetch a high dollar, but the information in that book far outweighs the cost.

tatting

Gina, after her hard work, getting the machine to sew again, went to the tatting table and proceeded to teach whomever wandered up to tat.  She handed us a free tatting shuttle loaded with thread as well as more thread wound on a embroidery floss holder and gave us her business card and proceeded to pass tatting knowledge onto all of us.  I learned to tat yesterday and enjoyed my success.  Here are my picos and my twists of over and under clove hitches.  I had always wanted to learn this.  There is no way a book could have taught me this.  I guess in this instance, I am a hands on learner.  I look forward to the day where I can get smooth and fast with the shuttle.  For those of you interested in learning some of Gina’s Technique she has a youtube channel.

Please do not confuse my work with the finished work at the back of my featherweight.  That is the gift Gina gave to me after attending her lesson.  Such a sweet gesture.  Much love in this gesture.  Truly I thank thee.  Another treasure to my TOGA trove!

And one of my favorite classes was with Janet Plotkin.  Does this name ring a bell to any quilters out there?  She is part of the success behind the Booty Ruler!  And she is a doll and a comic, with a funny story around every corner!  She is a member of North East Texas TOGA.

Janet Plotkin

Here she is in one of her serious moments!

And before I got to learn to tat wandering up to Gina’s tatting table, Janet’s partner in crime was seated and was given a tatted piece by Gina.

allison

Allison is her name, and a clever girl she is!  She decided to put her tatted piece over the button on her jacket….genius!  Janet and Allison are the team behind the booty ruler.  I did not realize that the booty ruler is made right here in Texas, Plano to be exact!  That is were their shop is located and it is called Fabric Fanatics.  I must make a trip one of these days to go see this place, as I have never been and it is only an hour away.

I was hoping during my retreat visit to TOGA, that I might come across a spool pin doily for my machine.  No doily but I did purchase a flower that someone had made for the occasion.  Sew very clever!

spool pin doily

After I purchased my featherweight I realized all of my thread is on a larger core than what my machine accomodates and wondered what the solution would be for this.  Guess what?  At the door as you signed in yesterday, making your own name tag was a basket full of wooden dowels with holes in the center.  After asking about them, we were instructed to take one as they were free and an adapter to the thread problem that I had.  Wonderful!

spool pin adapter

My mind is blown to all the things I saw yesterday, all the people I met.  Sew much personality under one roof.  A truly joyous experience to treasure for years to come.  I came in like a sponge, and left feeling full of love, love for new people I met, and love for what they do, and love for what lays before me with the knowledge I now have.  Mission accomplished TOGA!  Nicely Done!  For those of you who were in attendance, who are reading this now, are probably wondering who the person is behind this blog?  I was the one who answered when you called the name Dawn.  🙂


Snowballed 6 Patch Tutorial

I am excited to share with you a pattern that I invented this week.  And I am sharing it free.  I ask only for you to give me credit if you use it, the pattern is mine, the blocks you make with it are yours.  Thank you….signed Dawn, Webmaster of Myquiltprojects.wordpress.com

Now, the formality is done lets get busy with the tutorial.

A 6 patch, this is probably known by another name, but for our purposes we are calling it a 6 patch today.  A scrappy simple block.  For this block you will need one 4 1/2 inch square and five 2 1/2 inch squares.

step1

Sew the left two 2 1/2 inch squares together.  Then sew the three remaining 2 1/2 inch squares together like sew.  Press seams up and to the right.

step2

Next sew the the left sewn two squares to the 4 1/2 inch square.

step3

Now, you will take the bottom row of sewn 2 1/2 inch blocks and sew those to the bottom of the joined 4 1/2 inch block.  Press seams out from the 4 1/2 inch block.

step5

Lookin’ mighty scrappy so far!  And you have completed your 6 patch block.  This is a great scrap buster.  I had so much fun pulling fabrics for this.  But best of all I used up almost all of my 2 1/2 mini charm packs.  Great variety, no cutting, win win!

The rest of this tutorial is a brainstorm I had a few night ago.  You see I am in a block swap.  These 6 patch beauties will be swapped for someone else’s.  I kept thinking, how am I going to make this my own and make it different than the other swap members?

I decided on using my Folded corners ruler.  I was playing around on the ironing board and came up with the idea by actually folding the corners of 4 of these blocks and magic happened!

togaimproved

By snowballing a large square and a small square on a 6 patch, and joining 4 together it makes a secondary block.  A spool!  How appropriate!

So the tutorial continues.  I chose cheddar as the spool color.  Even though the whole quilt will be scrappy, I have decided to tie them all together with a cheddar color.  You could use any color, have fun with it.

For each 6 patch you will need one 4 1/2 inch square of cheddar, and one 2 1/2 inch square of cheddar.

Place your 4 1/2 inch square of cheddar with right sides together to your 6 patch block aligning with the existing 4 1/2 inch square.

step6

Using the Folded Corners Ruler, by Doug Leko, trim your corner.  This ruler is amazingly accurate!  Perfect for snowballing!

step7

Now you have two seams to sew, one on the 6 patch and one bonus HST.

step7a

In the next step you will use your 6 patch and align your cheddar with right sides together in the opposite corner from your previous snowballing.   Using your ruler, snowball.  Sew the 6 patch cheddar trimmed seam as well as your bonus HST.

step8

step8a

Finger press, and then iron.  I am pressing all of my cheddar seams towards the cheddar.

cheddarsnowballs

And you are now ready to join 4 snowballed 6 patches together alternating large and small cheddar to get this block below.

step9

The great thing about this secondary block, it will go throughout the quilt making these spools magically appear.  I have always wanted a cheddar quilt.  I am well on my way.  All of those bonus HSTs will be incorporated as corner stones around the perimeter of the quilt top.  I am far from showing you that portion, but am certain it will happen soon.  Here are some examples of my bonus HSTs.

cheddar

My fun has just begun with this scrappy project.  Just working a tad here and a little here, I have already sewn almost 65 blocks with cheddar goodness.  It is sew great to use up all those scraps, and to move fabric out of the stash.  I hope I have been clear on the instructions.  Please if there is something you do not understand, pose a question in the comments section.  Thank you for reading my blog!

Snow Balls from the Sky

It hailed at my house this afternoon.  It has been years since I have seen anything here measurable or as big as today’s.  It is a sick feeling to work hard for what you have to see mother nature’s fury.  The good news, it was short….less than 20 minutes.  It never got bigger than shooter marble size.  Boy they sure did bounce off my rooftop though.  It was almost as if it was a trampoline for them.  All in all, probably no damage.  Perhaps to one car that is now 10 years old and already had cellulite for door dings and such.  Character added to that car I suppose.

If you think about it, hail is ice.  In the winter it is known as sleet.  In the summer it is known as hail.  I explained to my daughter that it happens when the upper atmosphere is cold, cold, cold, and it meets very warm moist air.  The dust in the clouds gets so cold it freezes.  The humidity causes layers upon layers to pack onto that piece of dust.  And before you know it, you have snow balls falling from the sky.  I had to change that last part, because she thought it would be fun to throw them not realizing how dense they are and could take out a window or a small animal.

This is pretty much the only news around here.  Far better than worldly news as well as national news.  In quilty news, I did get the binding completed on the Garlic Knot Marinara quilt.  I checked off that milestone on Tuesday.

gkmcomplete1
Whoa! The cosmos of angles going on here. The quilt is perfectly rectangular, not trapezoid as pictured. That is so weird!

I brought the TOGA blocks I am working on back out.  I have already sewn my 22 for the block swap.  But when laid out that is not enough 6 inch blocks to do go very far in covering anything at this house.  So I am cutting up my scraps and making more to keep for myself.  I am adding color in the place of the big neutral square.  I am kind of liking that.  I had oodles of mini charm packs which is a precut size of 2 1/2 inches square.  Most of these blocks utilized that from my fabric stash.  I never thought I could mingle purples and plums with browns and bright reds and blues, as well as pastel yellows and pinks.  It is working out fine.  I love scrappy!

TOGAblocks1

I played with the layout of this and wanted to make a secondary block from the pieces I have.  I came up with the idea to fold the corners and add the same fabric in all four corners of this block.  It then forms a spool which is SEW appropriate for this swap.

togaimproved

I have some cheddar for the spools and probably have enough to make it contrast throughout the quilt.  This will involve carefully placing the large HSTs to the out, bringing the smaller HSTs in, or vice versa.

I don’t really have any plans in the sewing dept this week and will probably just play with what is convenient.

I did have a thought today about quilting the Jelly Roll Race quilt just using the bar tack stitch every couple of inches.  That sure would make a nice and soft quilt, not sure how labor intensive that would be?  Have you tried this?

The cat is about ready to pop and have another litter of kittens.  I love baby kitties.  And then they grow up, loose their cuteness, and find cattitude.  The momma cat is not like that, so there is hope!  Have a great weekend!

Tilda’s Girdle

Last weekend I made a Tilda doll.  I loved the process and it is nice to work on a sewing project that does not take weeks.  This weekend I attended a SAS (a sit and stitch workshop where you bring your projects and just sew).  I got the body of the doll made.

This time, during the construction I decided to go with a white on white print for the girdle portion to keep her modest if the children decide to take off her clothes.  I also used a decorative stitch on the line between the two different fabrics at the legs and the bodice.  Because I was at the workshop and only packed a couple colors of thread, I did not stitch the portion how I wanted.  I thought the lace idea up at the workshop and made do with what I had.

I had a baby sock stray that was once one of my daughter’s.  Used socks….there is really not a market for them for donation especially when they are a loner.  I decided I really wanted to use it as socks on the doll and used the finished edge of the sock to fold down over the rest of the sock just like a pair of socks.  I then saved the rest of the sock and wanted to make a turtle neck out of it.  The best idea I had was to make a dicky turtle neck, but the idea of that is ridiculous for a doll.  So I incorporated that into the collar of the dress.  I do not really like how this dress turned out.  I tried to fit it at the bodice, and the arm ratio to the bodice is not quite right, I am not tearing it apart.

tilda2-3
This poor doll has no shoulders…..a bad fitting garment is too blame.  Garments should accentuate not flaw the body.

This doll I also made bend at the knees for a more pose-able posture.  I did not put gloves on this one either.  I did get out my chalk and gave her some peachy cheeks.  I still have to add the eyes and add a fastener at the back of the dress.  For not having a pattern it turned out ok.  Good enough.

Yesterday, at the same workshop, I showed the continuous bias binding method.  It involves only two seams and is really practical and quick.  You can take a square and turn it into yards and yards of bias tape.  If you are interested in seeing this method done, click here for the tutorial.  This is the video that taught me.

Here I am hand stitching along on the binding of the Garlic Knots Marinara quilt.  I am less than halfway and due to the use of a dull sharp yesterday am probably not going to finish that today, let the punctured finger rest.  Need-less to say I threw that needle away.  For years that stupid needle has been in my pincushion.  I did not know needles go dull and kept using it thinking my fibers were just extra thick.  I have resolved this problem and it will probably not rear it’s ugly head for a good while.

gkmbinding
Here is the front and back all wadded up in the chair waiting for my nimble fingers to complete.

I was a bad girl and bought more fabric.  Precuts have great markdowns at nancysnotions.com.  I got layer cakes and jelly rolls for less than $18.  Stocking up for a rainy day.  I shouldn’t have but did.  My stash is probably not as big as yours.  But when you have such a confined space for sewing, digging through and finding the right fabric wears you out, where you do not want to sew.  A mess to clean up with the aftermath of digging is not any fun either.  I am thankful of my accumulations as I remember lean times, when the creative juices would flow and there was no fabric to sew!

Enjoy the rest of your weekend!

I made a Tilda!

I have had a Pinterest account for about 5 years.  It is a great resource if you get stuck when winging it like me (others call it improv I hear) with what ever craft I am making.  Usually it involves quilting, free motion quilting and the like.  For 5 years, even though I had not searched anything relating to Dolls, Tilda would be pictured in different outfits, striking a pose for the camera (practically saying “cheese” even though she is mouthless).  I finally decided I had enough, I made one!

I assume Tilda is a Scandinavian doll by her name, and could not find any websites with much info on them other than pictures.  Even though she is trendy on Pinterest, as far as clothing patterns that are printer friendly as well as the doll herself are not really out there.

So I decided I would make my own pattern.  I mean how hard can it be?  Er….my pattern failed.  Not by design but by execution.  The first Tilda had a blow out in the head and ankle.  Her injuries were too great in the sewing room, she got a proper burial much like many gold fish.  In the trash she went.  When we have time vested, setbacks like this are great because you learn what not to do the next time.

The reason why the doll failed….I used the wrong type of material.  I had a polyester blend which unraveled greatly.  The 1/8 inch seam allowance caused the blow outs during the stuffing exercise.  Stuffing this doll is exercise!!!  If you have arthritis, this would be something you could do, but may have to take many breaks.  Thankfully I had my stylus/bamboo skewer.  This enabled me to get the smallest amount of stuffing in the narrowest parts.  And the great thing is, she did not end up looking like a bunch of cellulite (although that does add character and I must have lots of character myself!  hehe)

I designed her clothing to be reversible.  The yoke can also be a hat.  I made sure when I made the doll body (in case the children decided to play with her) that she always wore gloves.)  My daughter commented that I sewed the arms wrong as the purple hands did not look right.  I informed her, Tilda is a lot like many women today.  She can scrub toilets with those gloves, and then go out elegantly with a night on the town.  Plus this Momma did not want to hunt up the gloves assisting them dressing her, let alone put the darn things on and take them off.

I used woolen rug yarn for the hair.  This yarn is chunky 3 ply.  I separated the strands and hand stitched them to the head for a gob of hair.  I will probably make additional outfits for her as the girls get interested in playing with her.  I see a woolen coat in her future as I have a bunch of wool (and with wool you do not have to hem, the edge is already finished).

This was a nice day project in between chores.  Perfect for breaking the quilting monotony.  Sometimes taking a small project and bringing it to completion gets us through those long drawn out quilty projects.

When you craft you accumulate things.  The only thing I did not have is muslin.  But I managed my scraps.  I made a huge mess digging and finding all that burried treasure in my trove of fabrics.  Note:  The purple and print fabric in these pictures were freebies I received from a co-workers Grandmother.  She gifted me the fabric, I gifted my time, my daughter will receive the benefit of this all coming together.

Happy Easter!

tilda1tilda2tilda3tilda4tilda5tilda6