Being Colorful

Whoa!  They say “Time flies when you are having fun!”  Jeezo Pete, I must be having a blast.  February is already coming to a close, can you believe it?  It seems like last week was New Years.

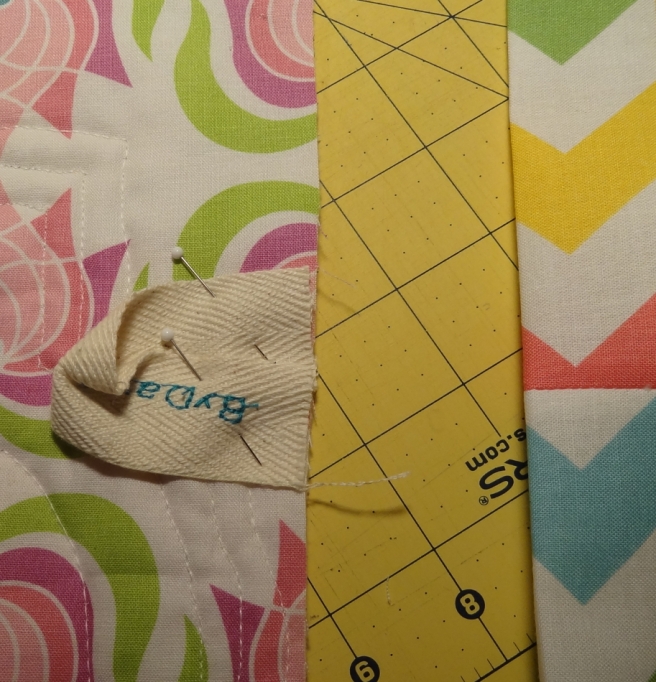
My scheme for the weekend was to cut all my BOM parts for each of the foundation pattern pieces in the quilt kit called Be Colourful by Jacqueline De Jonge.  It was a bit intimidating at first with a 36 page booklet.  Most of these pages were cutting tables for each of the coded  foundation flying geese circles.

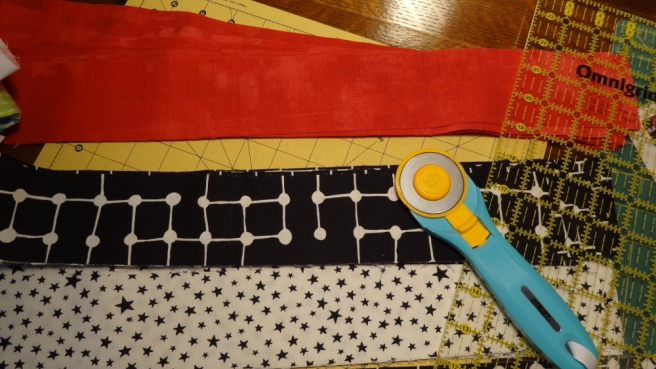
All day Saturday and a huge chunk of Sunday, I went through each color one by one and rotary cut various sizes.  I was worried about cutting wrong, but realized after the first color cuts, that there were predominately two sizes used with 1/4 inch loss.  By cutting my fabrics the way I did, so far I have ample fabric leftover.

The colors of fabrics amaze me.  Perhaps something I would not even look at in a quilt shop, placed with a couple of other fabrics all playing the color wheel game with one another, really speak to me.  The colors jump off the cloth and strike my eyes with the greatest beauty.  Boy does that sound cheesy!  I am rambling!

The colors in this quilt kit, some are so close in color my eyes cannot tell the difference, so when I cut, I assigned what I though was the right number to the swatches and will continue with that plan throughout the quilt right or wrong, no matter.  It will be beautiful regardless.

All my baggies are filled with rich, vibrant batiks.  Each baggie labeled with the correct number foundation piece pattern.  The layout of this quilt kit/pattern is rather genius.  I dreaded the cutting, but because everything was so precise, loved this part of the process.  Not too much of one fabric to cut, to get bored with before moving onto the next color.

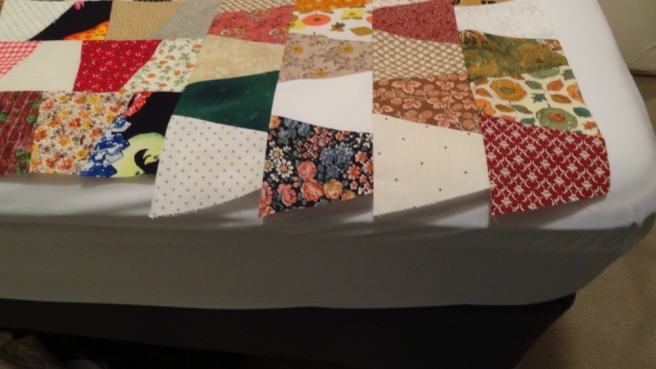
Now I am actually sewing the foundations and am enjoying this process immensely as well.  Because all the pieces are cut, this is quicker than I thought.  My sewing table is not a mess because the cutting part of the job is behind me.  The play of colors, the contrast of the colors is beautiful.  I just had to sew these quick.  And will probably sew a few more, and get a bit of this out of my system before getting back to the Star quilt.  (The star quilt needed more fabric for the backing so I made a quick trip today and scored the backing.)

becgeese

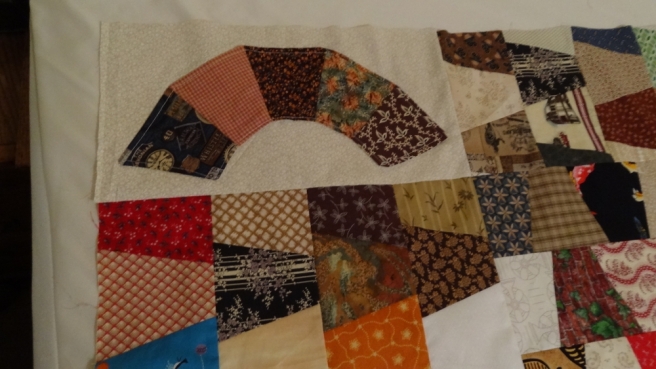
See how the royal blues are almost identical in color hue?  See how lovely the contrast is?  I am in awe of this whole thing, and it takes much to enthuse this old quilter!  I will probably one day in my future do another foundation paper piecing pattern.  This will be a hard act to follow no matter what I do.  I am already dreaming of the intricacies of FMQ and only have these 4 arcs sewn.  This will be the wind in my quilting sails for a good while, and am very happy I have chosen and am up for this challenge.


Fumbler Fan Flimsy Finish!

Boy howdy!  Say that three times real fast!  As promised (well not promised but noted) my goal was to have the tumbler quilt top finished by Saturday and I have met this goal.

designwall
Here is the main body of the quilt top
designwall2
Borders added that look like this on two sides
tumblerfan.JPG
Here is the top border, this is the short side and destined for under the pillows.  I really flubbed up on the top border of the quilt.  So tumbler became fumbler.  But I am not taking out a stitch.
tumblerfan2.JPG
A wide and narrow border come together.  It was not planned like this, but ended up like this.  Who says quilt blocks always have to be square?   This was a nice change.  The tumbler fans are stitched together and then with right sides towards fusible interfacing stitched to fusible interfacing.  The interfacing snipped in the middle, turned right side out and pressed into place and basted onto the quilt block.
tumblerfan3.JPG
And here is the plan for the drape off the foot of the bed.  Sorry for the blurry photo, but someone messed with my camera settings and I did not know it until I went to edit my photos.  Blurred photos are better than no photos?

I will probably blanket stitch around the tumbler fans before this gets hand quilted.  I did not take measurements but know this is not perfectly square.  It fits nicely with drape on my queen size bed.  I can’t wait to get this hand quilted and feeling the softness cuddle me while I sleep.

In lieu of getting the Fumbler quilt finished and off my work space, I have completely abandoned the baby quilt I am making.  I stalled on this because I do not want to buy any fabric.  Shopping the stash is work, you have to stack and unstack large totes loaded with many fabric pounds.  I managed to find some gray solid for the rest of the quilt top.  I will probably put little calico printed pieces for more action lines for the star randomly on the quilt top to break up the drab gray a tad.  Not sure if I will do this today or not, but am glad I did not have to purchase fabric. (I did discover I have nothing to go with this for a backing so I will be going to the fabric store).

star8

If I do anything with this for the weekend I will get it finished into a strip and get all those y seams put in and get the hard part out of the way for mindless sewing when I need it.

And the kit I purchased arrived and I have read the instruction booklet.

kit

This quilt is so complicated it has a booklet of 36 pages to explain things.  I can tell after reading through the whole thing,  it was severely edited because it doesn’t tell you key notes until halfway through.   It also recommended to check the website for mistakes and notations to be added to the pattern.  After doing this I marked up a small subsection of cutting instructions.  According to becolourful.com those added pieces will leave me just a hair of fabric left and gave the manufacturer information to get more fabric if needed.  This pattern maker prides herself with allowance extra for all piecing, but this mistake was large enough there may or may not be enough fabric.  The part I dread about kits is cutting and having a whoopsie moment.  The good news it is paper piecing and is very forgiving if the ruler slips.  I may start cutting my pieces for this and using the ziplock bag system and labeling as I go because of the difficulty level.

I am the kind of quilter that likes to sew one block for an audition before she cuts for a whole quilt.  With the ease of cutting of different short cut tools to speed up the process I think I am probably the only one who does this anymore and will probably go against my own grain and refrain from the audition block.  I think doing the same block consecutively will improve accuracy with each block and mastery before I complete all the blocks.

The good news with the complicated and  intricate pieces for the becolourful pattern, if I do cut this up and bag the pieces I will be able to sew and put away quickly if another baby quilt is needing to be stitched.  I figure with all the foundation paper piecing, it is going to be long and slow and will have many interruptions.  Who knows I may grow tired of doing the same one over and over and switch gears to one of my UFOs.  I really need to get going on at least two of those.  I have these two to choose from, one would be a quick finish, but it is the dragging everything out and putting away everything you are working on.  When you have a small space like mine, you don’t care for this part of your hobby.

Next weekend is my sewing club’s workshop and we will be making the garlic knot quilt blocks.  Mine will look like these.  All of us ladies will have the ability to swap 40 blocks with one another.  They claim it will be a scrappy look.  Somewhat it will, but there will be a lot of red in this quilt.  I am not really a red person.  It is a wait and see thing.  I am still dreading the 1/4 seam allowance on other people’s blocks.  Most non-quilters do not pay heed to the rule.  Perhaps when I get other peoples blocks I will tear them down completely and rebuild.  Not my favorite colors but the process is nice, and my optimism vs pessimism….well one of these will win in the end.  The jury is still out on the winner of that battle, another wait and see moment in life.

garlicknot

Whilst the rest of the house was sleeping I was editing and writing this blog.  I have the whole day ahead of me and look forward to the slow pace of weekend normal-ness.   We have gotten much rain, days and days of it.  I was excited yesterday to actually walk in to work without being rained on.  I will probably need to wash my jacket today as it has gotten wet so many times this week that it may be growing mold!  I am happy as a clam to be inside hearing the rain drops fall outside.

Enjoy your weekend!

Tumble Bumble Along

The trend these days in blog land is join/participate in a quilt along.  And some of you are participating in my sew along without even knowing it.  How is this possible you ask?  If you have ever sewn a leader ender, or are doing so right now, then we are participating in the sew along together.

A leader ender is a simple quilt pattern where you can have blocks setting next to your sewing machine albeit strips, 4 patches, HSTs or tumblers.  As you end a seam of your current project, you always sew part of the leader ender and have a piece under your foot so you don’t waste so much thread and it also helps older machines from getting hung up and nesting on the back side of your stitches.  I started work on my tumbler leader ender in October and got so far.  Then I set it aside to sew On Ringo Lake.  My leader enders at that time were the small HSTs that I trimmed off the corners of the flying geese blocks.  I wanted to make sure I utilized all that expensive fabric.  Now that the flimsy of On Ringo lake is behind me I wanted to get the tumbler leader ender out of my way.

I don’t know how many times I have moved it, touched it, picked it up, and put it down.  I had made great progress but still had all these single blocks as well as paired and quad strips that would be in my way and get relocated, until they were in my way again.  (A frequent occurrence if you sew in a small space).  Yesterday I sewed the main part of the quilt with one border side.  I counted the pieces I have left and will have to delve into the scrap bin and stash for the remainder of the three sides and start accuquilt cutting those.  This is what I love about a scrappy quilt.  You can add a different fabric at anytime with no one being the wiser.

designwall.JPG

For the borders of this quilt, I decided to turn the tumbler block 90 degrees and am happy with this effect.  I will do this on the remaining 3 sides.

designwall2

This being on my mind for a good 24 hours, I kept wondering how am I going to do the cornerstones of the quilt and then it came to me in the wee hours of this morning.  I will sew them and create a curve and trim them up to fit the corners.  Not there yet, but hopefully by the weekend be done with this top.

I have already signed up on a long waiting list to get this hand quilted, and hurray it costs no more than if I were to get it long armed with a pantograph pattern.  Once I get this quilted (which is months out) I will pass on the price and contact information for those of you wanting their services.  All proceeds benefit our city’s senior citizen center for supplies and nice treats for the seniors lunch.  (On Valentines day everyone who came ended up with cake and ice cream)

After sewing my top I trimmed up the edges which looked like this and then sewed the flat tumbler tops and bottoms to the now trimmed edge.

designwall3

I am still working the star quilt and am liking the affect of star tails.  I need to figure out an overall fabric for the rest of this quilt and will probably have to go to my LAQS to help with this as the only color I have is white.  And if a baby quilt is going to get used, white is not a friendly color for mom’s laundry schedule.star8

A balmy 70 degrees this evening and we will see what the night offers my needle and thread.  Thank you for reading my blog, Happy Monday!

A Star is Born

After receiving my star making template I delved head first into making stars.  I wish now I would have made large solid stars for my first one as it would give me an audition of the block without the complications associated with pressing.

Making the centers spin on this is not working for me and I will have to figure out what I need to do differently.  I think the next one I make I will make my triangles and then sew the triangles together instead of piecing the 30 degree pieces to make a 60 degree, and then a 90, and then a 120…etc,  going around the star I think was the wrong approach.

This template is made by Csoki-folt and is called the Capella 10 inch template.  I think I will get my moneys worth out of this.  It makes a perfect block, but you must mind your 1/4 inch seam.  You need to make it a scant seam, meaning stitching just outside (by a thread) of the 1/4 inch line.  If you fail to do this, you will give your seam ripper a workout!  (Don’t ask me how I know.)

If I ever make a large bed size quilt using this pattern I will have to have some kind of place to lay it out and be able to sew while looking at it.  Otherwise, all the angles and flips/flops my mind will not track, kind of like an old VCR!  Too much snow globe in the noggin sometimes!

The reason this template works so well is due to the lines for your strips.  Without the lines on the template,  it would be impossible to layout and cut.  I am going to experiment one day with this and add some highlighter tape and stager the strips in the stars for a stair step affect.  Not sure if that will turn out.  I will try it out on my scraps.


star7

Not sure about the background fabric I will use for this.  There is really nothing that goes with this in my stash except some white and I  really don’t like using white because I have children and they cannot keep their mitts off with their grubby hands!  (I cant name them, who doesn’t like to pet beautiful fabric!). I know I will have a lot of left over fabrics and may do a piano key border around the edge or perhaps make this a row quilt on the diagonal. That is still to be determined.

Fun learning something new, something no one else has done.  This template came from Hungary and we had to pay in pounds.  It translated to around 30 USD for those of you interested.

Earlier this week as I mentioned in my previous post, I abandoned my fabric diet for a day and and purchased a kit online.  It hasn’t arrived but was on sale and looks very advanced.  I really like doing really advanced patterns because the payoff is beautiful.  The only thing I dislike about a kit is if I have a cutting accident, and it leaves me short, with nothing for a replacement.  Cutting is my nemesis in quilting.

kit.png

This kit is now sold out where I got it, but is probably still available in other places.  Be careful as it is expensive because it includes the foundation papers.  I admire quilts with such great contrast!  This is called Fanciful Flight by Jacqueline de Jonge.

My volume of sewing this week is not as high as it has been.  The last two days my feet have hurt so bad.  Something is causing inflammation on my heels.  It feels like they are bruised with blood blisters (much like when you were young and going barefoot and stepping on a rock and getting a blood blister/bruise on the bottom of heel.)  If I elevate my feet, they throb with pain.  Pain taxes my system and pills are not my go to, so I do without pills and keep the pain.  Perhaps I will fudge on my no pill rule and do some Aleeve before the end of the day.

Sad, because all the cold weather we have had, this symptom had gone away.  One warm humid day of 73 degree weather and bam, it came back that fast and doesn’t want to leave.  I think there is something putting a lot of pressure on the nerves in my heel.  I think I may have nodules growths causing my pain and this is associated with arthritis.  These nodules are on my knees, my toes, my knuckles and are quite disfiguring.  It limits your mobility, and the one on my knee has spread greatly, it is from giving so many baths to the children being on your knees on the hard tiles, those gristles bursted and are now large under the ligament that hold my kneecap.  Thankfully the ones on my hands do not hurt, only when you press on the gristle under the skin.  I hope I get as much quilting in now, while I am healthy because I fear my hobby will diminish as I age.  I know of no one in the family that has had this and this is something inherited. But in the past people did not speak of their aches and pains, they just lived with it.  And here I am complaining to you, and there is nothing you can do!

I am off to do laundry and vacuuming, Chicken and Dumplings from scratch for supper.  The rest of the weekend is to be determined.  Have a great weekend and thanks for reading my blog!


Busy in the sewing corner!

I just finished the Mirage quilt made from the butter and eggs pattern.  You can click here to read about that.  Shifting gears quickly as another baby is due and the colors are seafoam.  I finally made it to my LAQS.  They have not seen me since Nov when I purchased a few pieces for On Ringo Lake.  I have been trying to use up what I have.  I had no seafoam.  I found some beautiful fabrics and then pulled the rest from my stash.  All are not pictured below as I am not certain of the direction I am going to go with this star quilt.

star1

I am using my new template!   The video made it look easy, so there is a learning curve and my angles in my mind have a hard time going at my normal pace.  Slow and steady wins the race eh?

I have starched and pressed the fabric and have cut them into 1 3/4 inch strips WOF.

star2

There are 4 strips that need to create a strip set.  I have selected these and am ready to set the template in and cut.

star3

I have successfully cut to partial stars out of one strip set.

You know I like un-encrypting the mystery behind a template.  Sometimes they are difficult to use and confusing.   I have laid the cut strip set on the mat, and now know you can save yourself about $30 and use the lines on your mat.  For confusion sake I may try this, I am undecided yet.  The try out period is not over so I am on the fence about the future of the template.

star6

I am also working on a garlic knot pattern that was given to us free for a workshop we signed up for.  Free fabric came with sign up and the red was provided by the workshop. Now I am working on the homework before the workshop.  We are having a garlic knot swap at the end of the workshop and I want to participate but yet cringe at the 1/4 seam allowance rule and how the inexperienced people (not quilters) will give blocks that do not meet those dimensions.  It is up to those attending the workshop to bring their variants of black with white and white with black fabric.  It will make it scrappy, supposedly.

Three fabrics all cut at 2 1/2 inch sewn in strip sets.  The red will be the outer part of the block.  The white with black stars will be the center of the block.  They are telling me there will be enough for a 40 block swap after you sew and cut your 5 strip sets, 15 pieces of red, 10 pieces of black, and 5 pieces of white.  I have cut them and the numbers are not coming to 40, more like 20.  We will see how this develops.  I got this done and also noticed that my selvages were not in total alignment all the way to both ends and so there was some fabric loss.

The pressing instructions were provided and have followed those.  I am ready for the workshop on March 3rd.

garlicknot

Once you show the workshop attendee what I have sewn here they give you precut bars of red that would be 4 1/2 inches long by 2 1/2 inches.  This was very easy, the hardest part was pressing.  I am certain there will be a story behind this and will post all about that after March 3rd.  Thanks for reading my blog, and have a great Fat Tuesday!

Butter And Egg Mirage

In my last couple of posts you have seen snippets of fabrics, quilt tag making, reference to the butter and eggs free pattern, and now I have named this quilt Mirage.  When looking at this with the fabrics used, it has a mirage effect on the eyes.

I started with my fabrics, and the theme was aqua and lime!

1morrocantiles

I chose the pattern of butter and eggs.  You can find this pattern at quilterscache.com

butterneggs

Here is the top waiting for the quilting.  This quilt I used Misty Fuse and raw edge appliquéd to the blocks using the appliqué stitch on my machine.  I chose a yellow thread for this.

I made my own quilt label, much like a clothing tag.

tag5

And stitched on the binding, after quilting.  The light was just right coming in the window to really show the texture created in the quilting.  I quilted this with a white thread.  It is very imperfect as I am still getting used to my non-hopping foot.  Gosh I miss that thing so much I may have to get one just like it.  That hop helped me keep my rhythm with my stitch length.

mirage1mirage2

The front and the back with texture and tag goodness.  This quilt is done and scheduled to be delivered tomorrow!  Now I am off to plan the next baby quilt.

I just love doing baby quilts because you can sample the patterns that are on your bucket list, but they are small enough you do not tire and actually finish them quickly.  This quilt was easy and did not take long.  I just had interruptions of cooking, cleaning, working my 40 hours, plus, bathing.  Life would be boring without those interruptions, no?  Thanks for reading my blog.

Please visit my other blog thecookbookproject.wordpress.com

I share my recipes with all.  My latest recipes are Southern Buttermilk Biscuits and Whipped Cream Poke Cake.

Handmade Quilt Tags: Traditional Meets Modern

I am not certain if I have ever seen this before, or if it has been done before.  I know identification of Quilts has been around for centuries, not new.  I know there are many quilt labels with lots of information on them.  Some are quite large.

I wanted to create a tag much like a clothing tag, something attached to the quilt with a simple few words.  You can purchase tags, but you only get a few and they are relatively expensive.  I find it odd that someone will make a homemade gift and then purchase a tag that says its homemade, an oxymoron don’t you think?

Here are a few steps to create your own tag.  You can run this from corner to corner on the back side of your quilt, or where ever you want it.  I chose a different way which worked too.

First you will need to get your hands on some gross grain ribbon or twill tape.  (These are free when you purchase a fat quarter bundle and a great way to recycle them just turn the print to the inside)

Next stitch one end to tear-away stabilizer.  Below I used a piece that had a good spot left in it.

tag1

Next, using your decorative letter stitches, embroider a message in your twill tape.  I kept my simple.  You could put the name of the quilt there, the date, a person’s name, and the list goes on and on.  After stitching the desired text, I cut my tag about 4 1/2 inches.  This will vary depending on size and amount of text.  Oh, and tear away the stabilizer!

tag2

Next you will choose the spot you want the tag on your quilt, garment, or homemade craft.  I chose the back side of the quilt and pinned it in place.  This step can be tricky.  Make sure once your label is done it is readable!  I also staggered the twill tape to make it easier on my machine, this is another option totally up to you.

tag3

I then stitched my binding on as usual.  I attached the binding to the back side of the quilt over this pinned on label and sewed it all together.

tag4

I then hand stitched my binding to the front and now the quilt is tagged.  And voila a new way to do a traditional quilt label!

tag5

I feel like my noggin really accomplished something today!  A win for me and passing the win onto you!

Linking up with  2018 Tips, tricks, and tutorials.  Thank you ladies (quilting jetgirl and meadow mist designs)!   Thank you for reading my blog!

Being Volunteered!

I belong to a sewing club that donates to the community whenever possible.  We had a very large donation sewing event at the beginning of the month and this week was our follow up meeting to discuss what could be changed, what could be better, what the takeaways are, and planning for future events.

This year I will be doing an FMQ demonstration at one of our monthly meetings.  Communicating lots of information in a short period of time.  And was volunteered for that.  I am comfortable doing this and agreed as I have been doing this for years.

I was also volunteered to demonstrate a snap press that no one knows how to use.  I have taken it home, done some research, made some suggestions for more dies and am waiting to give this demonstration.

I was also volunteered to teach a class on how to make an iron caddy tote.  Since I do not have a pattern and winged it for my previous ones, this will be a bit of a challenge.  Everyone wanted it.  So again I agreed.

Thursday was our meeting.  Because I forgot my camera, and I am responsible for updating the website (yes I volunteered to do this too) they decided it was necessary to purchase a camera as a club asset so if this happens again, anyone can grab the camera and point and shoot.  I kept getting volunteered by others to research a camera.  I turned that down, but they kept volunteering me.

And due to my class of the iron caddy tote which requires lots of materials, those were discussed and everyone wanted the kits pre-made up with all the stuff already done.  All the batting cut/purchased, all the insulbrite cut/purchased, all the aluminized cotton cut/purchased.  So, more pressure.  But I kept getting volunteered to be the purchaser and kitter to make things as easy as possible.

They wanted me to research the dies/snaps/grommets for the snap press and because I started the ball rolling I agreed to this too.

I had turned in a donation quilt.  No one in the group new that I was the one that turned it in.  When asked by the sewing president everyone volunteered me again.  I said no and was starting to notice that no one else in the group wants to educate themselves to educate others.

Predominately it was one person who kept saying my name over and over voicing her opinion on what she thought should be done.

Have you ever been volunteered to do something?  It happens occasionally right?  And because you have one task volunteered, you accept, no biggie.  You put on your big girl pants and buck it up!  But what happens when there is a group of 16 people who keep volunteering and using the same people over and over?  I say if you don’t show up to the meeting you automatically get volunteered but then that would not be fair as I know all too much about the unsightliness of being volunteered too much.

The favorite part of the meeting is when we get to show and tell what we have made or what we are making.  I am beginning to dread this part because every time I bring something, someone wants a workshop or demo on the subject.  They want me to show them how to make a sweatshirt….they want me to show them how to make a denim purse, they want me to show them ________________ fill in the blank.

Now I communicated after the meeting, and after it hadn’t set well with me, and after I gave it much thought on how to handle this.  I almost feel like I am a dog, and they are my masters.  I was warned by a loved one that this would happen….he was right.

So I had to put my foot down and am very prepared for the next meeting.  I told them when you have too many irons in the fire, one can spontaneously combust or burn out.  To prevent that the volunteering of others needs to stop.  Or, I told them the next favorable option for me was to quit.  The next person that tries to volunteer me, I am going to turn it around on them and volunteer them and see how they like it.  Treat others as you want to be treated.  I am glad they see me as a valuable resource, but most of this stuff is on the internet and can be accomplished on their own.  I don’t think I will be bringing anything else to show and tell unless it is extremely complicated.  This group does not want to do those kind of crafts.

If you have any advice, I would love to hear it in the comments section.  Soap box done.

Twelve Percent

January has flown by and the old saying goes, Time flies when you’re having fun!  I must be having lots of fun.  Can you believe that 12% of the year is already behind us?  I think back to what I have accomplished this year so far.  I have progress but am dabbling in this and that.  Progress in that regard to hard to claim.

I have pieced my On Ringo Lake Top.  Linking up with Bonnie Hunter one last time for this mystery quilt experience.  If you are interested in seeing all the finishes and progress for this mystery quilt click here.

orl1

I have started free motion quilting on this gem, and got all of the sashing quilted with a squiggle.

squiggle

I have about 10 blocks quilted all the same and do not really like it, thread color and design.  I will progressing with a different design, but have not determined what the design will be.

I am currently working on the butter and eggs baby quilt.  I got that jewel in the state of saying it is now a top.  I really like the mirage effect this has and am glad I chose for the melons to cut special directional fabric as I did.

butterneggs

And yesterday I joined the sewing club I am in and enjoyed a day of Jelly Roll Racing.  I got to sit next to a young woman who had never sewn in her life and was able to accomplish a quilt top.  It is a wonderful feeling to pass on the knowledge I have.  Life them becomes eternal.  This poor woman, if anything could go wrong, it did for her.  The dreaded bobbin run out, and then the machine she was using belongs as an asset to the sewing club.  Whomever borrowed it last time, did not know how to thread it and a long piece of thread was tangled in the piston mechanism that runs the needle up and down.  Thankfully someone had hemostats to remove a good 8 inches of thread that was caught in the worst place.  I could not get it all out, and thankfully someone had machine oil and so it started working again.  We all had problems threading the dang needle.  I am so glad I have a needle threader on my machine.

The jelly roll that I sewed yesterday (I wish I had a picture) was of monopoly fabric!  It turned out sew neat and I wanted to keep it, but it was strictly for donation.  So be it, someone will be the recipient of it and they will need it far worse than I.  Here is the grand picture of a snippet of the race quilts done that day!

jjrsat

And then I came home and decided to sew my last homemade jelly roll.  Turned out very vibrant and colorful.  Those of you that have a large stash, you can make your own jelly rolls, and these jelly roll race quilts are so quick, and great in a pinch.

scrappy

Also, yesterday, our group starts a block swap of the garlic knot pattern.  This involves three colors of black with white, white with black, and red.  The club purchased the red as it is a hard color to match.  So all the quilt blocks we will be making next month with have different black and whites but the same red.  I think the dark to the outside is going to look funny.  We will see.  So I have my strip sets starched and pressed ready to get set and go on that for next month.

garlicknotpreview

Lots of sewing going on here, productive, but no finishes yet.  February, even though a short month will be high on the productivity scale I do believe.

I have also gotten a new magazine and been cooking a few new recipes from that.  I have made my rendition of skillet cornbread and you can visit my other blog and get the recipe here.

Be looking for a post soon about a cookie made in the 10 inch cast iron skillet, a huge cookie served like pie wedges….delicious!  Thanks for swinging by and reading my blog!  Keep quilting!