Back in the Groove

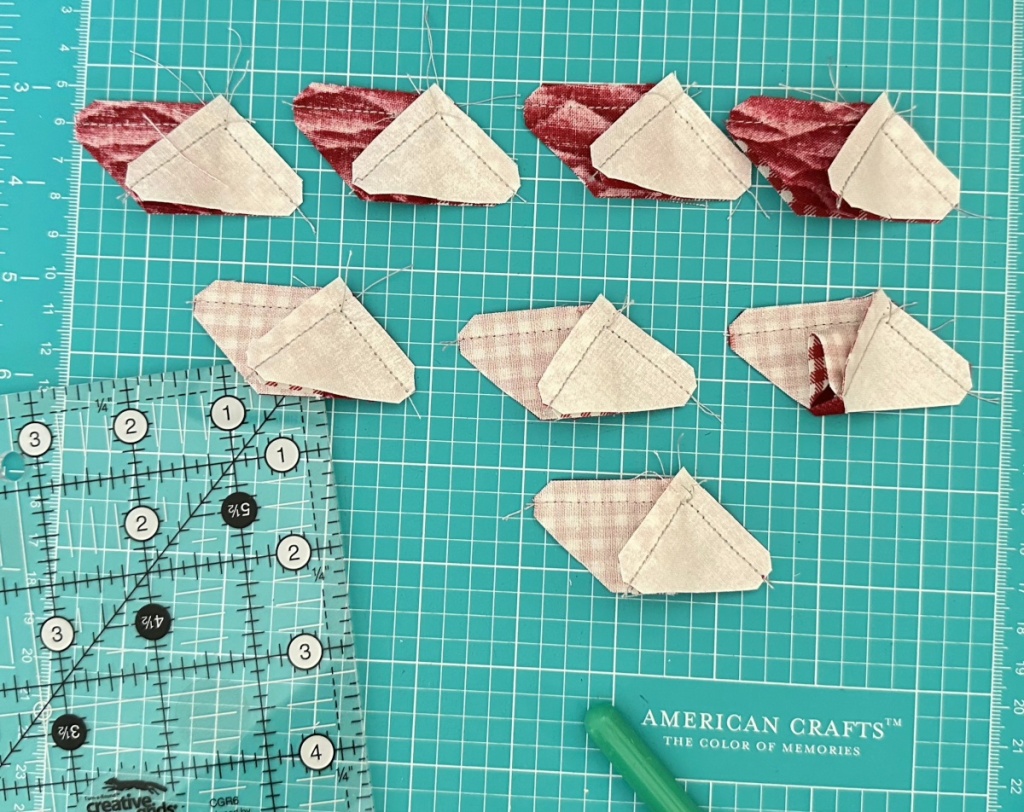
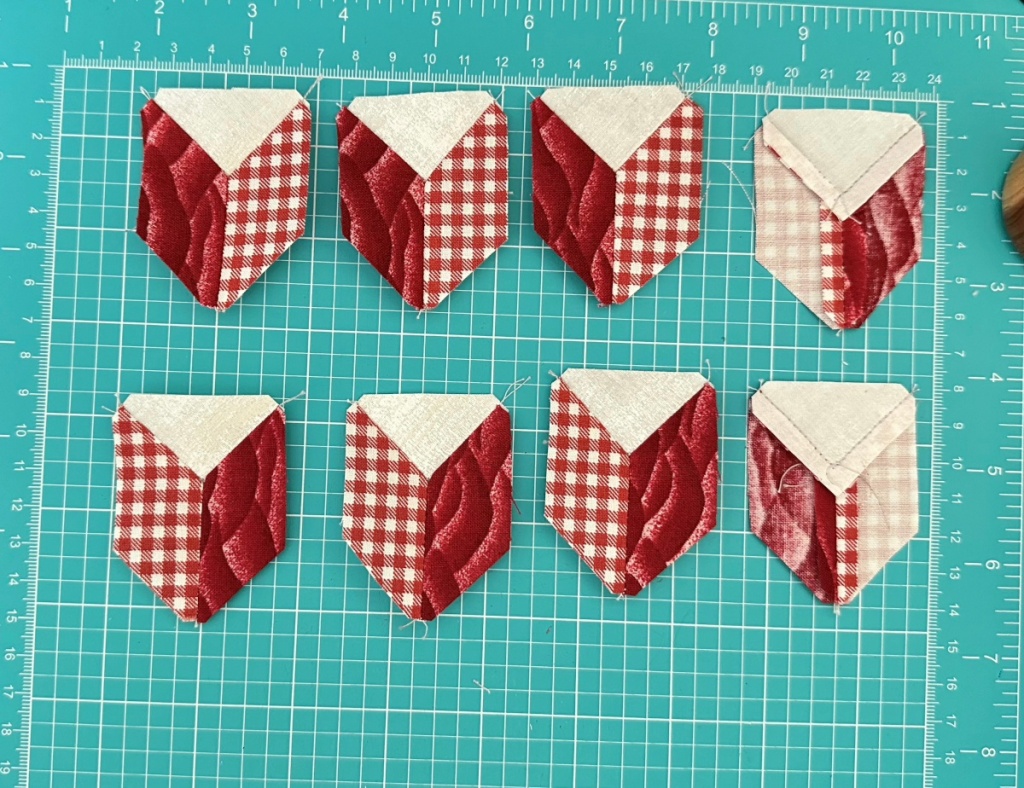
Those of you who are following me know that I am in the middle of a quilt along. I am also in the process of making a legit kits. I have been struggling with both! I feel the quilt along blocks are nagging me like a bad husband. I don’t even want to touch those blocks right now. (insert frowny face here). I guess the thought of them going on for atleast another 20 weeks is a downer for me. I am so focused on when the finish might be that I have lost my steam for now on these blocks. For those of you who are doing the quilt along, this gives you time to catch up, take a break, move onto something else for a bit. I am hoping that my posts will resume next week. But for now lets talk the legit kits.

I got the three top rows completed, and the very bottom row done, and am a good ways thru the second to the last row. This quilt was way worse than a nagging husband. This quilt was torture for this content creator. I actually love the process and the precision of this paper pieced kit. And I will add that these kits are beautifully engineered to ease the difficulty. I am not speaking bad about the company or the kit. But, for this scrap quilter, I just could not go on. My first mistake is choosing this kit. I really loved the 3D idea of the quilt. As some of you might know, I love color and the happiness associated with color. The grey background is my least favorite color. So if you are thinking about purchasing one of these kits, make sure you are in absolutely in love with all the colors of the quilt. Constantly processing grey make in every block just could not trip my quilting trigger so it became a stall. The excitement became drab. And drab does not speak to me as a color except down and depressed. So to eliminate the stress this quilt was giving me, it is now shelved. This may become for sale in the future. But for now, I just needed a break from it! This project and I are now separated as of last weekend. And my quilting woes immediately rectified and all came back to me in all their glory.

A good while back in 2019 I attended a TOGA or Treadle On Gathering Academy where all us vintage sewing machine enthusiast gathered in rural Texas for our yearly retreat. Some of the ladies participated in a block swap which was an easy 9 patch. I had laid this out in 2020 to try and figure out what I was going to do with these signed blocks from the swap. Last week my minds lightbulb turned on very brightly and I started to get to work to showcase these lovely signed 9 patches. I decided to make the into the super stars that they already were. And in one week got this project into full top status. My backing is sewn, my binding is ready for this quilt to get loaded.

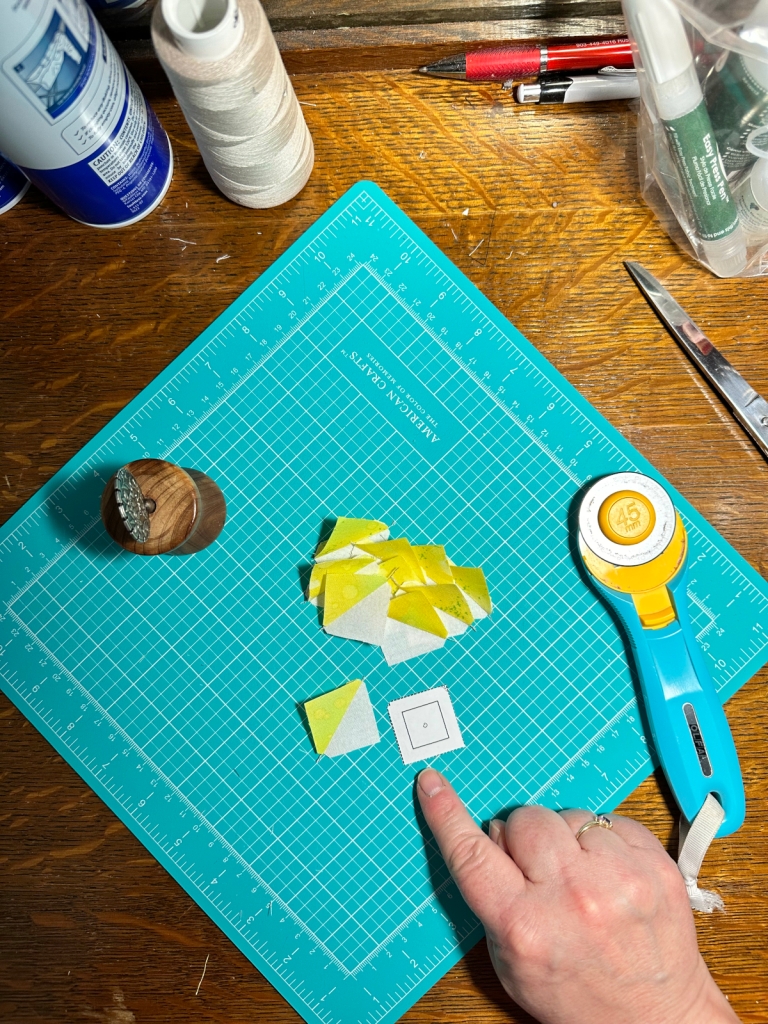
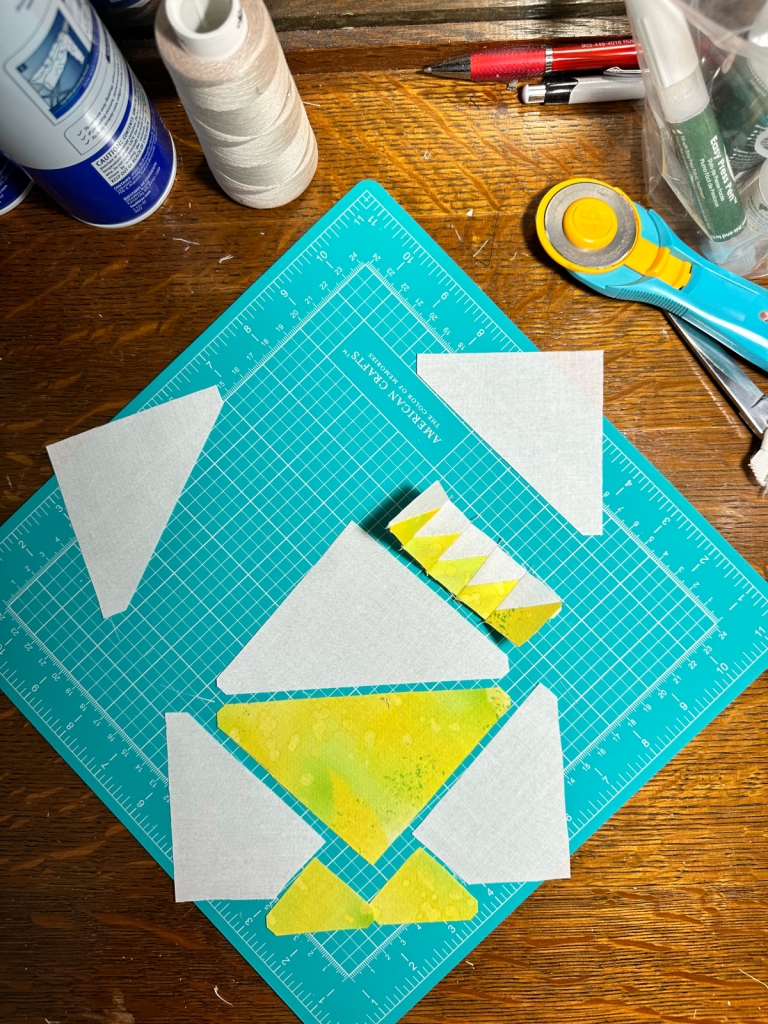
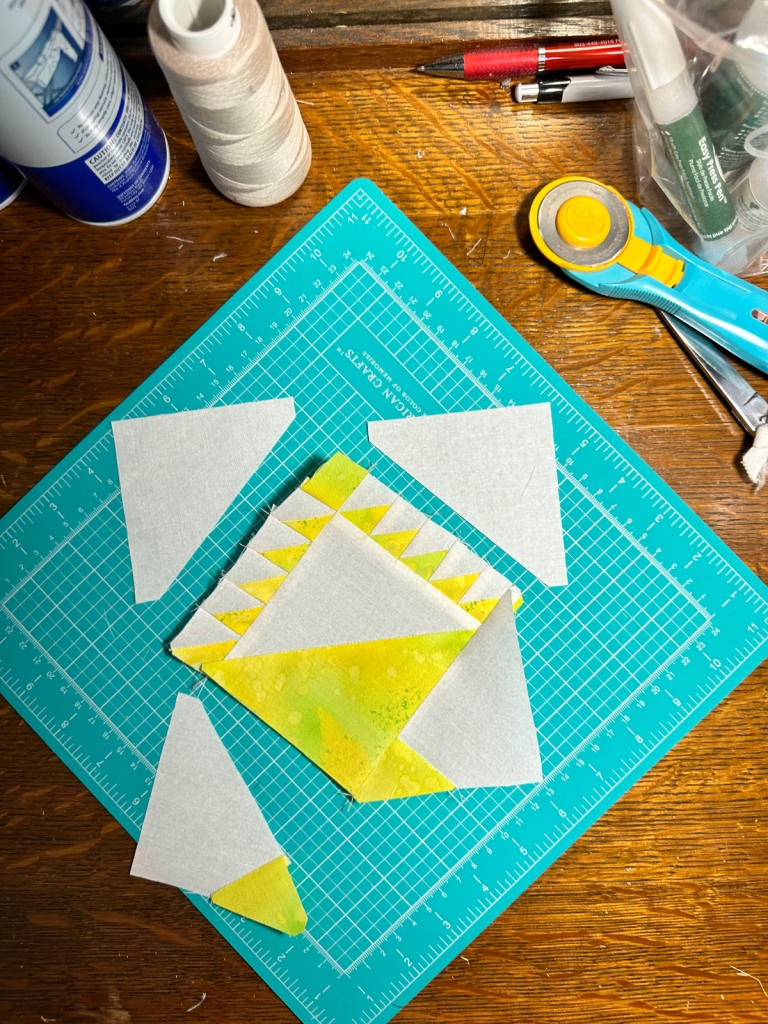
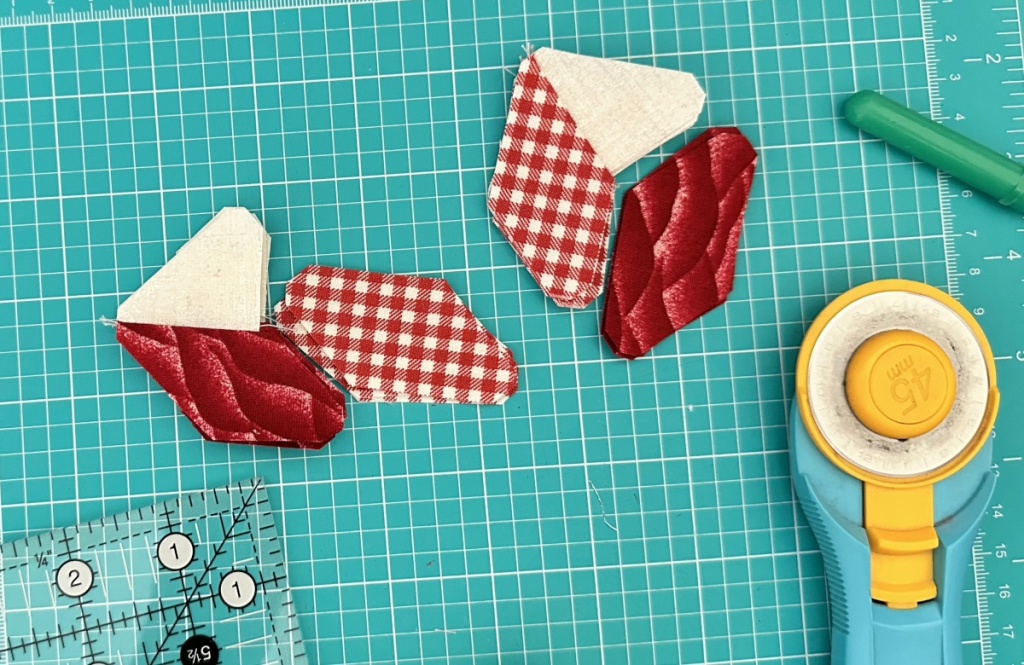
For those of you interested in my scrap processes, make sure to check out my video on what I am calling Scrappy-Do.

Even though the color saturation is a bit off for some of the blocks, I used oodles of scraps and made them work for me. This measures 72 by 72 and just in one week!

And while my momentum was up, there was also a procrastination of sorts. My kitchen chairs are 80 years old and were in a major need of recovering. So I got three of the 4 chairs done. My body will have to heal after working on the floor for hours pulling all my unused muscles from not being used to that. Man alive, I ache. But that will be gone in a couple of days. Here are the before and after photos. Lets see how long this lasts. If this lasts half as long, I will be dead by then and that will be ok with me.

So, right where the plywood base has those circles, is where the chairs started to tear. This was surprisingly thin vinyl. Those holes were air holes so when you sat down on the vinyl, the air would escape and the chair cushion or what was left of it would compress. The chairs were orginally made by the Brody company in Chicago IL, or so said the underside of the original cardboard bottoms I removed. The legs and back are welded and only have 4 screws into the wood. For that being such a simple design, it sure has been sturdy and lasted. Now Chenille upholstery fabric is on the chair seat. The chair backs are not torn and match the formica table so I left the chair upper alone.

So what does my coming days have in store? I have decided to make another Kaffe quilt. This one will be flowers. I have done my fabric pull and am already liking the fabrics together.

While I am doing laundry today I will probably start this. This will be an easy build and pretty quick too. Be looking for progress on this soon!

And thanks for reading my blog!

Fruit Basket ~ Block 40 ~ QAL

It has been a hot minute since my last post for the free pattern quilt along. Todays block is the fruit basket block. *disclaimer I done my block in the wrong colorway! Sometimes I just don’t have my thinking cap on.

Proceed in which ever colorway you like. I failed to do mine in the assigned color in the legend. But, I am not redoing it because this was pretty labor intensive.

Step one download the templates. I would utilize all the templates. And yes, I have verified these are accurate. Step 2 cut out all your pieces. For reference I have written the sizes or approximate sizes on the pieces. Again, use the templates solely for this block.

Make your HSTs for the handle of the basket. These are a funny measurement.

Step 3 After making your HSTs it is necessary to use template G and trim them down to that weird size.

Step 4 Layout your pieces. The remaining steps I did, I probably would have changed up just a tad and sewn the center HST together before joining the handle. Follow the pictures step by step and sew your pieces.

And now just sew those remaining corners. This was pretty labor intensive but not hard.

Viola!

And for those of you who are here for the first time, you can go fetch all the blocks. Click this link to get to the rest of the quilt along free patterns/links.

Thanks for stopping by and reading my blog!

National Quilting Month Scrap Happy Style

Did March come in like a lion or a lamb? My daffodils have already bloomed which is waaaaay early. The blue bonnets are popping up already which is waaaaay early. The weed bloom for January was late and did not happen until February. Spring is marching in, but the rhythm in nature is a bit off this year. Here in the states we supposedly had the warmest winter of all time. But I did not notice a difference. Our rain pattern was different this winter. Our March came in like a lamb, so it will go out like a lion. Towards the end of March is when tornados and stormy season starts. As much as I appreciate the wind and the rain as they have their purpose, getting it all at once is a bummer. Hopefully, that algorithm in nature will be off, and we will not go out like a lion.

What have I been up to? I have been taming my scrap pile. I had recently bought some nice new neutrals and decided to purge the smaller pieces in the bucket for that colorway. I worked at it for 2 days and still did not finish, but my neutrals are all in order (sorry not pictured, they are in order for me, but probably not according the general public LOL).

You would look at this and not even think this pile of scraps was much of anything! I methodically started with my bigger pieces and cut those down to the largest size possible that I keep on hand. So, I ended up with some 5 inch squares which will eventually come in handy. Some 2 1/2, 2, 1 1/2, and 3 1/2 inch squares. I did not count these but I bet just of the 2 1/2 inch squares I ended up with about 800 pieces.

The far side of my bin had hardly any fabric squares when I started taming the scrap demons. This shows the real work, unlike the first photo. What will I make with this? No clue, but when I decide, because all the squares are cut, it will be a fast project!

This bin is messy and I have never had to double stack my fabrics. Again, not sure what I will make with my 2 inch bin but it will come together quickly. Most of what is on the top layer is what I ended up cutting up over the weekend.

And my 5 inch and 1 1/2 inch bin is completely full. Those neutral charms will also help me add to an existing charm pack and make a nice size quilt relatively fast when the time comes.

And finally my 3 1/2 inch bin, which I normally do not keep, but am needing to get going on my cathedral windows quilt, and have been procrastinating because I needed more variety in my squares.

Right now in my “quilting career” I am rather paralyzed by all the projects I have and the content I need to make and promote. I am finding it difficult to decide which direction to go, and so I have not really worked much of anything in the last 3 weeks. I am hoping to change that by the time this blog posts.

I am still working on this at the longarm. I am just laying my scraps over my quilt sandwich and then laying organza over that and quilting it. This method goes pretty fast, I have been delayed by the cooler weather. I did get back to it this week, and am more than halfway done. Unfortunately it turned cold again, and my weekend is booked with car repair and grocery getting. Will get back to it eventually.

I have entered a Texas contest for quilt blocks. Our agriculture minister is hosting a contest for what agriculture means to you as a texan and I have signed up for this quilt block make. They send you some scraps of fabric and you make a quilt block that represents Texas agriculture and what it means to you. I have not started but they give you an off white background, a stonehenge gold, as well as a bandana blue and a green. You can add your own fabrics, but I am still mulling over how I want to make the block. If my block is chosen and stitched into the quilt, my name will be embroidered into Texas history. I am looking forward to that make. In the mean time, make sure you to check out all the scrap happy links below. I am amazed every month how scraps are distrubuted into quilts and other lovely textiles. We all probably have enough scraps to be a scrap distributer LOL!

Kate, Gun, Eva, Sue, Lynda,
Birthe, Turid, Susan, Cathy,  Tracy, 
Jan, Moira, Sandra, Chris, Alys,
Claire, Jean, Dawn, Gwen,
Sunny, Kjerstin, Sue L, Vera, 
Ann, Me, Carol, Preeti,
Nóilin, Viv, Karrin, Amo, Alissa, 
Lynn, Tierney and Hannah

And for those of you who are here for my quilt along, I have two more blocks to post as they are done, but I have not written anything up. Here are a few of my latest scrappy blocks.

Here is a link to all the blocks if you sew chose to use up some of them scraps! Thanks for stopping by and reading the blog!

Fanny’s Fan ~ Block 39 ~ Quilt along

Today is the start of a new pattern for me. Today I am going to publish the templates with a few instruction here on the blog to keep you going, and to keep me going LOL. This block will require you to set a good bit of time aside to accomplish. There are 49 pieces! And Y seams! I am hoping in the previous videos I have made you have learned a great deal on Y seams, you got this!

First thing you will do, is print off the templates. You will ensure that piece J measures 1 3/8. You WILL be using the templates for this including the rectangles. They are very funny measurements that may not be on your ruler. The color way for this block is two different reds, a gold, some green, and background.

And here are the EQ8 cutting instructions if you chose you would like to use that to help you out.

Quantities as well as the colors are all called out in the cutting instruction.

Yes, I used the templates for all the pieces above as well as directly below.

So for piece D and E you will cut both of your different color of reds. Make sure to knock off the notches on the corners, this will save you when you are sewing this.

You can cut piece H using a 1 1/8 inch strip and subcut using your easy angle ruler, but your easy angle ruler does not have a 1 1/8 mark, so it might be best to use the template for that one. For piece F the larger hst, the paper doll measures just under 1 3/4. I went ahead and cut mine at 1 3/4 strip and subcut with the easy angle. This piece/corner, is where we will be trimming off excess anyway. Piece J square you can actually cut using your regular rotary cutter at 1 3/8.

For quanties, you can always look in the legend of your template sheet and count the Js and Is. These are cut from gold.

Pieces H and J are used here. I recommend when you sew this, you fold these pieces in half and mark the center and align the centers. I also recommend you press towards the green. I tiny economy block!

Sew opposing sides first, then trim and repeat.

Now here is the tricky part, your economy block is going to be a weird dimension. It will be the same width as Piece D. Center piece D onto your economy block and trim right to left and up to down. This will get you a square the same measurement as piece D which is the mating piece in the block.

Sew piece I to piece B. Make 4

Now sew piece I/B to piece A

And now we jump to Y seams. Layout piece E and G like so.

Here I have placed piece C background. You can achieve this in any order. Here is the order I did mine. Special note, because these are Y seams you need to start and stop at the 1/4 mark where all these seams meet.

I started by sewing piece G to piece C. You will press towards the red but pressing is not important now, we will address that later.

Here is where the order does not matter, I chose to sew my two red pieces together, starting at the 1/4 inch intersection. You may need to pop a stitch if you sew too much. It is far easier to pop a stitch than to put another stitch in.

Here I have folded away the reds and proceeded with the last stitch from piece E to piece C. If I have done this correctly, these pieces will open up without thread showing and will not have any puckers.

I have the right most piece turned wrong side up so you can see how I pressed these. Open your red seams and keep your triangle shape when pressing. If you do this any other way, it will go wonky.

Now for the last Y seam. I chose to sew my background block to the petals of the red fabric first. You can do this in any order. Make sure to stop and start 1/4 inch where everything comes together.

Here I have both sides of the petals sewn to the background block. Notice the bottom block, the reds are not yet sewn together. That is the next step.

When you do this step everything gets folded out of the way and out of sight. The seam sewn in this is the short side of the red. Again start and stop guarding that 1/4 measurement right at the junction. If you have done this right, your mirror images will be perfectly aligned like in the photo above.

Again press the red open and keep the back ground square pressed like a square. Yay! Y seams are done.

I recommend folding your green triangle piece F in half to find the center. Align the center of piece F to the flower center seam.

Before sewing your sashing in this block you will need to trim your flower blocks. They will measure the same length as piece D. If they do not, you will need to trim down your flower blocks. So you do not lose any points trim your blocks down on both green sides. Trim these to be 2 7/8 square. Do NOT square up the background corner. The background corner may be a tad wonky, but you have put a bunch of work into this block, you do not want to lose your points now. Proceed with making your 9 patch. Press this as you wish.

My block is not perfect, but it sure is pretty. This was a hard make. For those of you doing this one, Kudos for trying, Kudos for finishing. This one is really something. You will always remember the struggles when you gaze upon your finished quilt one day.

Thanks for stopping by and reading my blog!