Good Fortune Completed!

It all started on Black Friday 2018.  The first clue.  I opted for my neutrals to be black.  I sewed meagerly until the revel in Jan 2019.  And then I sewed like the dickens!

First it was fabric selection.

Then the clues:

And finally I sewed all the clues and caught up at the end of Feb.  Top done.  Now awaiting the perfect backing.  Eventually found, and quilted with a panto around the edge as well as the stars with the same panto as a medallion.

And the final product!

good fortunegood fortune 2

This is probably the prettiest quilt I have ever made.  Glad I went cheddar!  Glad for all those glorious pieces.  The borders really make the quilt.  I look forward to this years mystery.  You know I have participated three years now doing the Bonnie Hunter Mysteries.  Each year I learn something new.  This year I learned all about contrast!

Each year all the clues are broken down into 4 patches, HST’s, flying geese, and TST’s.  A gob of them pieces each week, sewing madly, blindly, having faith what you are doing is right.  And then it all comes together and you are soooooo glad you trusted in another quilter’s knowledges as right before your eyes you have a real, true, work of textile art.  This is one that I want to use everyday, but I want to save it forever as a keepsake.  Good Fortune will wrap it’s loving arms around many loved ones in it’s lifetime, that is what it is all about!

The end of June

The end of June is here, whoa!  Pulling up my reins to try to slow down life!  This year is flying by.  With June coming to and end, that only means one thing, The begining of July, naturally.

Cramming as much as I can into a week seems futile, but we all muster on, making as much as we can with the time that we have.

I have done well with this 100 mph week.  Setting of an actual goal has helped me so much.  Some weeks you just don’t get them done, but most of the time I meet or exceed my expectations.

Last week’s goals:

  • Finish quilting and binding of tshirt quilt (binding still needs to happen)
  • start quilting good fortune (Good Fortune is quilted)
  • Sew some more leader ender 4 patch diamonds.  (Done)
  • Accuquilt some more fabric for opposite blades  for the 4 patch diamonds (Done)
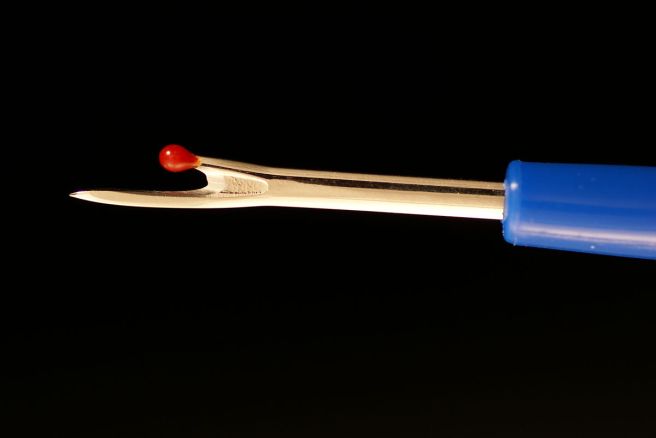
  • Demonstrate video  how to use the seam ripper properly for quicker rip-out results (Done)
  • Come up with a new plan for the D9P quilt top (Done)

I have managed a snippet of video on how to rip out quilting while it is on the longarm.  I share this as I struggled doing it the wrong way.  The wrong way can make a shredded mess of bits of thread.  My method is easy, fast, with no little bits of thread.  And yes, that is me in the southern drawl voice!  Oh gosh, I hope you will not need to turn on closed captioning to know what I am saying!?@

For those of you who knew right off the bat how to do this, kudos.  These are the little things in life.  🙂

Also I have briefly filmed quilting on a meander/ large stipple on the Tshirt quilt.


Good Fortune was loaded and the quilting is done!  I chose a pantograph pattern that was in a 4 inch row format.  That went around the outer border, cornering the same outward direction all around.  The same panto also had the same design I used in row quilting as a medallion.  I did this medallion within the stars.  I free motioned in the opposing blocks.  In between the black and blue border where no panto happened I free motion small stipple to fill the gap.

good fortune quilting medallion

I hope I did not over quilt it as I want to use this and be warm!  I chose black thread, because I really wanted the piecing to show and not the quilting.  I was a bit afraid of choosing the wrong design and ruining the beautiful top.

good fortune

A tad of new 4 patch leader enders have emerged from the opposite cuts in the Accuquilt.  Here is a small amount of blades laid out as well as a larger ensemble.

A new plan was stitched for the D9P.  A new photo opportunity will happen this weekend.  Stay tuned.

1

I ran the squiggle lines all the same going around the quilt.  In other words I trimmed 7 inch strips going with the grain for the full yardage which was the perfect size for this job.   In each corner of the quilt I placed the only 4 orphans leftover from making the D9P blocks.  This now measures 66 X 66.  I do not have the right backing fabric for this.  I would like to have a large floral on black or a geometric design on black for the backing.  Although my options are wide open.  I suppose I could go pink on the back, or blue, or teal with a pop of even more a color.

A visit with my LAQS will probably help this one along.  I am crossing my fingers the right one comes along with the right price.  🙂

A busy week, a productive week, and as all of us are, ready for the weekend!  Here I come Saturday and Sunday!  Whew!

Thanks for stopping by and reading my blog!


Lone Star Blade Tutorial

Ahhhhhh, sewing on my vintage machine, which never gives me any problems, so named Abacus because I can really count on him.  Always there for me to improve my mood.  🙂

featherweight2

Some stitching happened today.  Started off that I either lost my prescription glasses out of my purse in the parking lot at work, or they fell out of my purse in my drawer at work.    I rely heavily on seeing with them as the no line bifocals really improve small details and I don’t feel so dang blind, LOL.

So a quick run down the street where I keep my inexpensive off the shelf readers.  I keep a pair with my longarm, because I don’t know how many times I have been absent minded and just left my prescription glasses behind and then am handicapped enough I cannot thread the needle.  Absent minded and blind….a good combo on the way to old town LOL.

A few things in stitching these 4 patch blades I have learned along the way and I thought this was a good opportunity to share with those that struggle with this same issue.

Angles are funny.  I can look at it and think that I am squarely sewing, only to find I am scooootched off enough that it will throw the block off during its final construction.

For years I have made alignments with pins.  I call it a pin baste, call it whatever you like.

Here we have the two halves of the 4 patch sewn.  These go very fast if you chain piece.  I chain piece the two halves in succession so when I press they are already together and I do not have to look for a mate.  Notice below they are connected with thread.

2

Next I trim the dog ears, simply with scissors.  I also clips the thread holding these together at the same time.

3

Snip Snip!

4

Now onto alignment.  For years I have stuck a pin at the 1/4 inch seam allowance where the two fabrics meet, making the pin go down through the wrong side of the fabric, repeating for the other half just like this.

5

The above is time consuming but you can get it spot on if you slow down, take your time, and pin baste.  Yup, lots of us quilters do not like using pins, but sometimes the accuracy improvement makes it necessary.

6

After I have this pin basted with a pin, I fold the two ends up and compare the dog ears on each end.  If they match in size, I proceed and know my accuracy is right for points to match perfectly.  If they are not perfect I retry.

7

Once your accuracy is deemed close enough, stitch.  I have started pressing my seams open which creates a dog ear on each end that will have to be trimmed.  You can opt to press it in the direction which would eliminate the dog ear trimming.

These extra steps sometimes get frustrating and takes the fun out of quick sewing.  Then I had a huge lightbulb moment.  Matching raw edges which I just trimmed the dog ears from, simply match the seam allowance.

8

See the funny angle or eye illusion in this picture.  The seam allowance is in perfect alignment, but the ends overhang greatly, or sew it seams, LOL!  This plays tricks on these eyes, and so just eyeballing it will not work anymore.  Kudos to you if you can do it with the naked eye.

9

Notice where I am pointing with my pin.  You will align the edge of that seam allowance with the seam on the above piece.  The seam’s raw edge matches perfectly to seam finished edge.  Pin baste.  So far this is by far the quickest and easiest method for all this weird angle stuff.

10

Some of these are done with the first method and some with the second method.  I found the second method to be most accurate, and easier.  The two center diamonds are perfectly nested.  The outer two are off by and few threads, and if you take a few steps back you would never notice.  It will directly impact the alignment of the next raw edges you sew during phase two the sewing of the 4 patches together.

11

Above the point is very nicely aligned be the raw edges are offset.  This is showing the difficulty I am having while piecing these beauties.  The good news is that all of the raw edges at this point are bias, so if they are imperfect, you will be able to ease them in the next step.  This is turning out to be very forgiving.  Lone Star quilts look so hard, and now that I am working one, I am changing my opinion.  I do not recommend this if you struggle with making your points matching in other projects or if you are new to quilting.  Your frustration level might be high and it may become a UFO (unfinished object).

And in brainstorming (mentioned in my previous post)  for the D9P, here is the backing fabric I so wanted for this but currently do not have enough of.

1

I supposed I can wait until Good Fortune is quilted, and use the leftovers from it to help finish this.  but I really only want one seam for the backing.  Perhaps my mind is changing and will make this as a wild sashing for the front.  It auditions well with all of this quilt and it pops  with color.  Perhaps the backing just needs to be a solid black or muted black.  I am still brainstorming.  When I come across something I see that will work, I will know it, until then I will continue to seek out a solution.

In summary, our eyes can play tricks on us.  In my youth and having sticker book fun, the placement of the sticker was so easy.  Right where you wanted it, you were able to put it.  Now I seem to have an eyeball on the cheek syndrome as it looks perfect before I stick it, and that that perfect place and funny angle after the sticker is stuck IS NOT PERFECT.  In fact it is WAY OFF.  I assume this is some kind of depth perception problem.  You know the kind, when you are hanging clothes on the line and you go to grab the clothes line only to find your eyes have played a trick on you and you are no where close to grabbing it.  I recall a tidbit of a George Carling routine speaking of the depth perception and clothes line trick your eyes play on you.  Sewing weird angles and the success of this relies on good depth perception, pin basting, and experience of the good, the bad, and the ugly.  A direct result of who you used to be, who you are today, and who you will become tomorrow.

Thanks for stopping by and reading my blog!


Black Cohosh Life

close up photography of pills
Photo by Pixabay on Pexels.com

In the last few cool, rainy months, it has been impossible for my hair to be dry.  Normally in my routine, my hair is washed daily, twisted up into a bun, and the air conditioning at work slowly sucks the moisture out.  Lately when I take it down at night, it is still very wet.  My hair is down to my waist line and very thick.  The only thing changing in the last few months was lots of rain which is why I thought my hair was not drying.  And then it happened.  Life is starting to make changes for me.  They are natural changes, and I am excited about these changes.

photo of woman covering face with her hair
Photo by Bennie Lukas Bester on Pexels.com

So what happened?  While at work sitting at my desk, looking through a microscope, I felt a rush of heat start in my chest and slowly rise to the top of my head, and then it was gone.  A heat sensation rising within, I could feel the natural blush form on my face with this event.  My first hot flash.

gray microscope on table
Photo by Francesco Paggiaro on Pexels.com

And then I got to thinking…..is this why my hair is not drying?  When you have thick, long, wet hair and twist it into a bun, it takes longer to dry.  Add rain, hinders more drying.  Add a bit of movement in muggy conditions with a fur coat on your head, it is gonna sweat.

Yup, sweat was happening and I only noticed it with vacuuming in the hot house, I would just pour in sweat.  Hum….I guess it is happening.  My body rains uncontrollably.

bubble clean clear close up
Photo by Vlad Kovriga on Pexels.com

So back when I had the hives and was on a boat load of steroids, I started sweating bad in the night.  I mentioned this to my coworkers.  They thought This was hormonal imbalance, and it was, but not for the reason they thought.  They advised black cohosh, a natural way to achieve a higher level of estrogen when you have sudden dips.  Back then I bought a bottle, never took any.

And then my hair not drying, and the one hot flash, the mood swings, I have started taking it.  I did not take it for a few days, and then last night I got really angry, of three different ink pens not one would write.  Frustration levels high, pens thrown away, black cohosh orally, I feel better today.  I woke up with a dry head of hair, got a good nights sleep, and worry about my attitude towards things that don’t go as planned.

I think god made this plan for women on purpose.  In a timeline, you hit this new time in your life about the time you have teenagers.  This gives you the rage and fury to deal with them….nurture mom gone, mean mom ….. yikes!

The week started out marvelous and ended in a funk.  I will be discussing the end to my long hair as I have hated it for years, but I keep it that way because one person in the world likes it.

black calendar close up composition
Photo by Pixabay on Pexels.com

So the good start to the week and a funky end also was the case for my sewing and quilting.  Lots of progress and good healthy sewing.  Lots of quilting that started well, and then stalled with a major tension problem all of a sudden, and a new love/hate relationship with the seam ripper.

273B1816-68A7-465D-ABEC-9A2295307E42

Goals met:

  • Tshirts pressed, trimmed, sewn into a top
  • Backing for good fortune sewn
  • Backing for D9P not sewn as it seems my local area quilt shop….I bought the whole bolt of fabric to back good fortune, I had bought all they had….sold out forever.  Brainstorming what to do about this…*sigh*
  • Start quilting the D9P did not happen as I did not have backing.
  • Sew some leader ender 4 patch diamonds

Goals exceeded:

  • Start quilting the tshirt quilt
  • made a slip cover for the rolling pin

This weeks goals:

  • Finish quilting and binding of tshirt quilt
  • start quilting good fortune
  • Sew some more leader ender 4 patch diamonds
  • Accuquilt some more fabric for opposite blades  for the 4 patch diamonds
  • Demonstrate video  how to use the seam ripper properly for quicker rip-out results
  • Come up with a new plan for the D9P quilt top.

I seems like I have ranted here….*sigh*…….sorry.  But I hope I have communicated at least one thing you can use as a take away.  Thank you for putting up with this and reading my blog!

tshirtquilttop


Get down, Boggie, oogie, oogie!

I am in the fast lane, with the pedal to the floor, zooming through my goals set for the week.  This song suddenly popped into my head!  A lovely earworm for you to sing in your head while sewing!….Urban dictionary defines earworm as “song stuck in your head” lol!


  • Good Fortune backing sewn….check!
  • Sleeve for rolling pin sewn…..check!
  • Tshirt quilt, shirts pressed, cut, sewn, and now bordered into a top…..check!  Backing fabric ready!

tshirtquilttop

  • 4 patch blades are moving under the foot, a nice stack now ironed ready to mate with others…..check!
  • Backing for the D9P…..I love the backing fabric selected for this, but the piece is not big enough.  Other fabrics in my stash pale in comparision, so I will have to make a trip to my LAQS….still on the todo list.

I have the urge to quilt.  Didn’t happen tonight, sheduling conflict for Wednesday…..Thursday and Friday here I come!

May music stave off the midweek blahs, and boost your sewing superpowers!  Have a great week and thanks for reading my blog!


Lone Star Leader Ender

During Wednesday, the day I spent with mom, I took some busy work to do.  I took a bag full of fat quarter sized pieces down to 3 inch by 4 inch, and was determined to make my scraps as useful as possible.  Mom is the keeper of the accuquilt system.  The night before I decided to utilize my scraps using a one block system, meaning everything I cut would all be the same shape to make a quilt full of all one block.  At first I wanted to do a 60 degree triangle, but while thumbing through the blocks decided to go with diamonds, they are a girls best friend, right?

So I grabbed the parallelogram 45 degree die.  This was one of the first dies I gave mom and it was still in it’s package.

accuquiltparallelogramHave you seen the pattern they associated with their die?  If they would change it up to the Lone Star they would probably have more sales as NO ONE want to cut out these tiny pieces!  

I decided to make 4 patch units, a good leader ender project.  When I first started cutting, I folded my fabric strips on the die for the pass through the machine.  I learned that if I did that I would not be able to keep track of how many I cut for the reverse angle.  So I ran all my fabric through right side up.  I have enough pieces and boy are they small to make 1/2 of the star points of a lone star.  The next step will be to cut out all fabric face down.  I have plenty of scraps and cut for 5 hours.  I still had a bag of fabric after all that cutting.  It just never goes away!

lonestarblade
See how one side is longer than the other?  This is why I could not go argyle style.  And I will have to play with the layout as I may have to have an odd number of strips.

In this Lone Star leader ender wake, I also accumulated new wonky strings.  I have enough strings that I can make a scrappy string border if needed.  It felt very good to move all of those scraps from the scrap drawer and I can’t wait to start stitching on them.  This will probably be my summer project and it will take me a while.  My plan is still to sew matching scraps into 4 patches and then make bigger with those subassemblies.

I am not going to lie, originally I wanted to make an argyle quilt.  And I could but it would require a gob of rotary cutting a wonky shape with funny angles.  After playing with the layout, it will be Lone Star all the way.  And as much color as I have in these scraps, there is enough neutral that it gives it a very pastel, soft look.  I am excited!

I have met my goals set from last week’s post.  Dream big is bound.  The comissioned tshirt quilt, the shirts are now logos with fusible stabilizer on the backs.  Sometime this weekend I aim to trim them all the same size and perhaps a bonus to-get them stitched together.

I have added to my stash, 2 jelly rolls called terrarium.  Both in different colors, and both will be slated for jelly roll race quilts.  I also got a moda scrap bag for only $8.  Inside were 32 different pieces all of the same fabric line, all perfectly 3 inches thick.  I will have to do some math to see what the jelly roll race pattern size would end up.  I am excited about the new fabrics too!

I am excited to get sewing on the t-shirt quilt.  I really am wanting to quilt!  So perhaps I will get the disappearing 9 patch loaded and play with some thread this week.

Goals for the upcoming week:

  • Trim t-shirts all the same size and layout
  • sew backing for good fortune
  • sew backing for D9patch
  • Start quilting d9p
  • sew some leader ender diamonds

The weather is finally warming up.  Here it is mid June in Texas and I finally turned on the a/c.  Usually that happens in April for humidity, and may for heat.  Summer is finally here.  Those rays feel good on the skin, and I look forward to farmer tan lines on the tops of my feet were the sun meets the sandals, and at the edge of my sleeves on my arms.  Vitamin D here I come!  🙂

Thanks for stopping by and reading my blog!


D9P Blocks

d9p

A trip to the fabric store this week with a damage of about 20 dollars and I was ready to sew more 9 patch blocks and got these made Thursday ironing and cutting, and Friday sewing the 9 patch.

d9pbblock

Not the most attractive lot, but was keeping with the theme of scrappy and black.  Everything goes, even ugly fabrics LOL.

Last weekend I sewed a disappearing 9 patch quilt top at my sewing workshop.  It ended up being just shy of 40 by 52.  We are big boned people, so I wanted it a bit bigger for tuck in warmth.

Sewing happened and it felt good!

Today, I agreed to stay with Mom while Dad was at work.  He was worried about her fall. In her best interest it was no effort for me to be there today.  Grocery getting can wait a few more hours, or should I say the money leaving the wallet can be postponed.  So today I ironed the 9 patches and sliced them in half twice at Mom and Dad’s.  Laid the blocks out with the top and made the larger design (it was nice to use the floor and not have to worry about little feet or fans messing them up).  I did not measure this but it would be approximately 14 inches larger all the way around.

I decided to check out the fit on the twin bed.  It is probably considered on the small size of twin.  Perfectly sized for little people.  So the girls can use this or it will go on the back of the couch, whatever will be will be.

Not sure what I will use for backing.  I would like to go with black.  I purchased more than enough fabric for the backing of Good Fortune.  So after I quilt that, I will see if there is enough.  If not, I can piece something together as I have another piece that is a good 2 yds which would be half.

These are the twin beds in one of the rooms and Mom and Dad’s.  Both beds have matching quilts that mom made with matching pillow cases.  A beautiful tumbler design. I am really liking the D9P quilt with all the variety of color and contrast.  A granny square look in a quilt top.

No goals really accomplished this week.  Making for sure goals next week.

  • Bind and complete the Dream Big Panel
  • Start on T-shirt quilt for a customer

I have the itch to quilt on my machine, but do not have anything other than Good Fortune.  I really need a swift kick in the bohonk-us to get going.  But it being black I worry about all the dust showing itself.  I want to take my time on this and really make it as beautiful as it is designed.  Patience takes practice…and Practice makes perfect!

Have a great weekend and thank you for reading my blog!


Dream Big and a New Quilt Top

This week I finally was able to finish quilting the Dream Big Panel.  Thanks Mom for that purchase, it was good practice.  I still have not had time to bind, but it sure felt good to stitch!  I scratched that itch.

dreambbig

I only had two matching threads, so for the center and a bit outward I used teal.  For the remainder I used lavender.  There is just the right amount of contrast.  I hope to get this bound in the coming week.

Additionally I uploaded a new video while I was quilting.  It is another short video, but I did not think to just show you feathers and feathers, and more feathers.  I feathered this whole thing.  Click here to see the short video.  For those of you wanting to expand your skill set, learning feathers is not hard, it just takes practice.   A panel of any kind that you have no piecing work in, is PERFECT opportunity to learn or practice a new idea or technique.

Today was my E-Stitcher’s sewing workshop.  I got to visit with all my sewing Buddys from the past few years.  That was the best part.  Even better than that, I got to meet up Mellisa from TOGA.  She was the lucky girl who received a 301 free and they got it going for her.

sewing machine repaiur

We had a very pleasant conversation.  I suppose I need to get out more and “NETWORK” with my fellow sewing companions.  Coversation enjoyable with all,  friends accompaniment perfectly great, and a quilt top at the end of the day…..a very good day indeed!

12 of us came together.  Each of us brought 60 charm size fabrics to swap with each other.  So I brought 60 fabrics and got 55 back that were not mine which made for a very scrappy event.  First we sewed them into a 9 patch.  We were told to supply 48 neutrals.  I chose black for my neutrals since I had so many handy after making Good Fortune.

I laid the 4 corner blocks of the 9 patch as black.  Then in the outer 4 remaining I used the prints from the swap.  The center was a bit more neutral fabric than the surrounding blocks.  Once we got that sewn together, you bisect the block across and down.  And then you have fun with your layout.  The disappearing nine patch technique.

Today was the first time I have ever tried webbing.  I did have a snafu with that.  One of the blocks twisted causing a non pattern event in the center, but this is certainly scrappy and the seam ripper will rest.

This measures just about 40 by 56.  I will certainly be adding something to this for a border, but nothing is coming to mind now.  I will wait for my brain to dream of what to do.

d9p

As you see the black fabrics I have are LOUD which makes this certainly help the scrappy look.  I heard some in this workshop commenting they did not like how their fabrics were coming together and deemed it kind of ugly.  I hope they change their minds.  Scrappy quilts are grass roots Americana.  Every blasted piece of fabric was saved to keep someone warm at night for years to make it to quilt status back in the early days, hand stitched at that.  When one uses scraps, spending no money, it is kind of like Dolly Parton’s  Coat of many Colors.  Many memories in every stitch.  Now my fabrics that have the memories will be stitched into someone else’s quilt.  It was fun standing at the ironing board, and those standing next to me finding the fabrics they brought.  Like an “I spy” quilt too!

Because I used black fabrics in this, it kind of reminds me of the old crocheted granny square blankets.  Full of vibrant colors, lovingly stitched together.

Once again I am not setting any goals, but I still need to curb my quilting appetite.  I need to see what Mom has to keep me busy.  Now that all my sewing area is organized and clean, perhaps I will start on the t-shirt quilt.  All up in the air with no demands.

Life is busy, May is already gone, and the first day of June is coming to a close.  Wowsa time flies!

Thank you for stopping by and reading my blog!