Hello everybody, we are back for another easy block! Today’s block is a simple pinwheel, yay!
This block is very similar to the broken dish block, however we are using a different colorway and turning our HSTs for a different layout.
The quilt block is showing a blue and a white. You can opt to use whatever scraps you may have. Cut a strip from each color 3 1/2 inches. With right sides together, and using your easy angle ruler, cut 4 sets of HSTs. Sew, press to the dark side. Make your 4 patch, sewing each row, pressing do the dark side. I opted to spin my seam so all my 4 patch seams are going counter clockwise. You can opt to press towards the white fabric during the HST making so all seams spin counter clockwise. Press as you wish. For any clarification, it might be best to watch the video and let that accompany the instruction incase I have forgot to mention something.
Another block posts today, and this one as easy as it is, I had to use my seam ripper :(. Complacent and over confident quilter equals me sometime. Rail fence, two fabrics. Only 8 pieces is this block.
If you are here and want to join in, this is at your own pace and the archive of all the blocks can be found by clicking here.
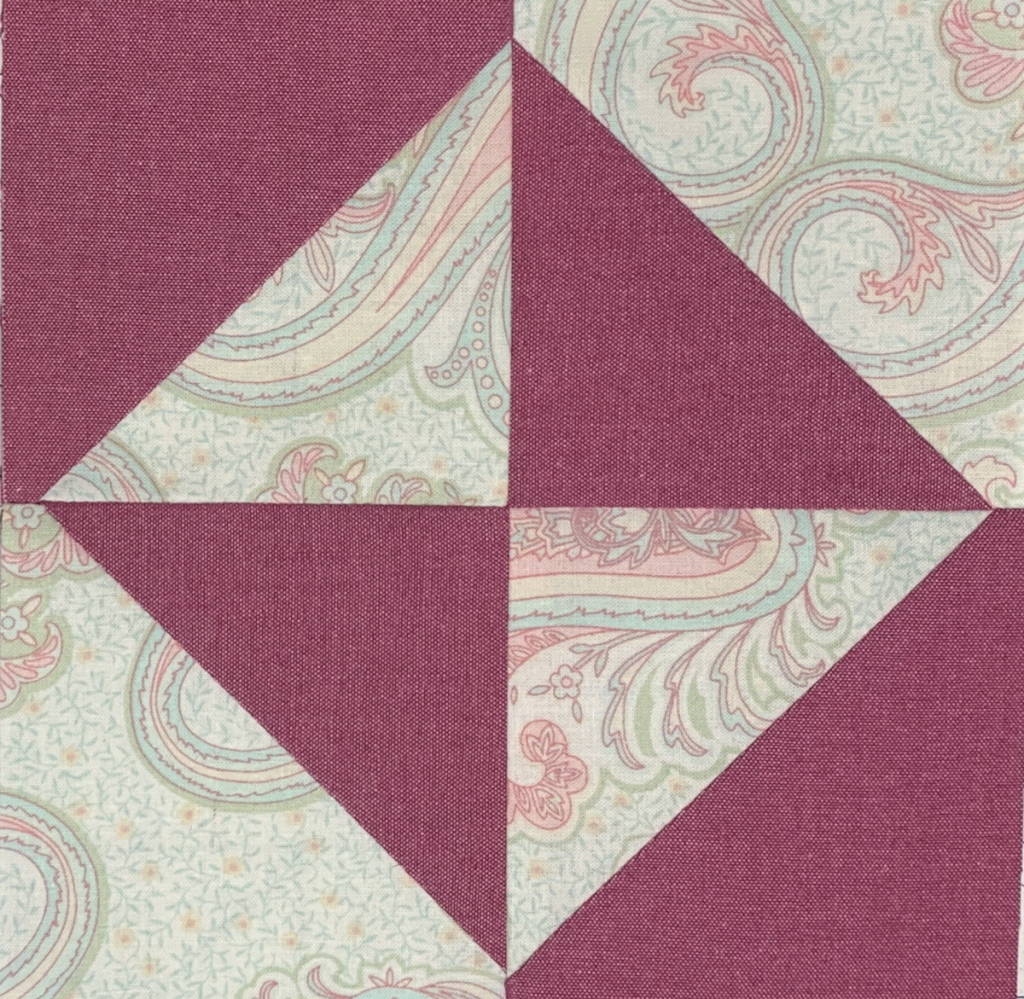
This called for a purple fabric and a blue fabric, although I see now comparing side by side, that the blue is more of a turquoise blue than what I selected. Ah well.
Of each color cut a 2 inch strip and then subcut that at 3 1/2 inches. Cut 4 of each color. Lay them out in the manner of the pictorial and not my picture of my block. Although, it does not really matter, nor do I think this change will impact the look of the quilt at all.
Press as you wish, I always try to spin my seam counterclockwise, but that is just preference.
If you want to see a visual tutorial, the video below will get you to the same point but with better instruction.
Welcome quilt enthusiasts. Today we are building the broken dish block which needs no templates, yay!
If you are here to find the other blocks, you are in the right place. Just click the link here, and it will take you to the previous 15 block pattern posts. If you bookmark that page it updates as I post new blocks.
If you are following the colorway in the pattern, today’s block requires a plum fabric and a neutral background fabric.’If you are following the colorway in the pattern, today’s block requires a plum fabric and a neutral background fabric.
Take both fabrics and cut a 3 1/2 inch strip. With right sides together, use your easy angle ruler and make 4 cuts or sets of hsts. Sew the HSTs on the long side. Press to the dark side, trim as required. Place the segments matching the above diagram. Sew each row, pressing to the dark side. Bring rows together spining your seam. All your seams will be running counter clockwise. Yeahaw! Another block complete!
For a visual tutorial, you can watch the video for any clarification. And please reach out to me if I have left something out, or forgot something. If I have not made sense, do tell and I will fix and clarify.
Greetings quilters and blog enthusiasts. It would seem I have reached maximum capacity of the blog and and have to do some maintenance and tech stuff to keep going. This post will be meager with only 1 photo and cutting directions. You will probably need to watch the video to make the block. I hope to remedy that very soon. Thank you for understanding.
If you are following along with the pattern you will need two complimentary turquoise fabrics and a lovely gray neutral.
You will need to cut from one colorway of turquoise two 3 1/2 inch squares. And from the other colorway of turquoise you will cut two 3 1/2 inch squares. From the gray fabric, cut twelve 2 inch squares.
On a square of turquoise, you will work a covered corner on three corners using your gray 2 inch squares. You will repeat this for your remaining turquoise squares. On two matching turquoise squares you will press your covered corners outward, and on the other two turquoise squares you will press the covered corners inward. You will then lay them out in a 4 patch that matches the above photo. Because of special care of pressing all angle seams will nest. Sew the top and bottom row of your 4 patch, press seam towards the dark side. Then join the rows, spin your center seam, all of your 4 patch seam should press counter clockwise. Please reach out to me if I have not described something clear enough, because I see the simplicity of this block, but as quilters we are all in different places of our quilting journey. What might be obvious to some, is not to others.
Greetings all! Welcome (back) to the No Name Yet Quilt Along. Today is an easy 16 patch of HSTs. In EQ8 it was called Mosaic Number 17.
As compared to previous weeks, this block you will find a cinch. There are no written instructions this week other than, gather your fabrics, cut strips at 2 inches. Use your easy angle ruler to make 16 sets. Sew those sets of HSTs. Press to the dark side. Trim to 2 inches. Sew hour HSTs into rows. Sew each row together nesting seams. I pressed every other row in a different direction. Spin the seams when you can, and viola, block done!
Here is the video for the make of this block. Due to the holiday, I could not run video or audio, it is what it is. But this one is simple enough
Greetings and welcome back or to the No Name Yet Quilt Along. And as pictured and titled above, we have the Kansas Troubles block pattern templates free for download. If you are interested in all the blocks so far, I am keeping them all in one place. Make sure to visit that post on my blog.
This block will require 3 fabrics as pictured, but you could certainly change things up and make it a two color block. I have selected my fabrics and cut my pieces utilizing my easy angle ruler. Believe it or not, even though there are many pieces to this 6 inch gem, it was a relatively easy block to make.
The layout can be tricky as you need a couple more halves of an HST, and it seems weird to sew them, but it works.
Once you get your segment blocks completed, you can opt to have the Kansas Troubles spin either way. I have chose to stick to the pattern on this one.
And like I state in the video, instead of spining my seams in a clockwise motion, when I sew this 4 patch together, the bulk in the blocks wanted to be pressed in a counter clockwise fashion. And spin that center seam for the least bulk, flatter pressing.
Pleased as punch how this one turned out. Make sure after you sew your quadrants together you square up your block to 6 1/2 inches.
Please refer to the video for all the instruction for cutting and piecing this fancy pinwheel block.
You will be happy to know, this block is a lot simpler than most of the blocks we have done up to this point, hurray for easy! Welcome. If you are here wanting to see the rag jacket make, be sure to check out those posts, here and there.
If you are here for the quilt along, you are in the right place! Here is this weeks printable PDF templates.
You can opt to not use the download and get out your tri-recs ruler as well as your companion angle ruler to make this block. After making this block, I was inspired to make a whole quilt scrappy like, out of this block! This may make my bucket list.
When using the wing tip part of the tri-recs ruler, you will need to flip the ruler over onto it’s back, or when you cut your pairs of pieces, pair up your background with back ground, which will cut the reverse or left side of the star tips. Weird, and not used to using that way, but it worked. Incidentally, you will be working from 2 1/2 inch fabric strips for this.
Your companion angle ruler is used for the center square. You will align that on the 1 1/2 inch mark to make those cuts (you can either use the 2 1/2 inch strip or you can cut a new strip at 1 1/2 inches and work from that.)
Here is how my block turned out.
And here is the full on tutorial for this block via YouTube.
Greetings quilt enthusiasts! Welcome to the No Name Yet QAL. Todays block is foundation paper pieced. If you have never done any foundation paper piecing, I recommend googling that topic before preceding with this block. I also recommend viewing the whole video tutorial before starting to sew this.
For the fabrics, you will need about half a fat quarter of background. The model is showing a nice light blue. I found some blue print in my scraps that I opted to use that. Use what you have. You will also need some coral color for the star points. I precut my pieces to 2 by 2 1/2 inches to help keep the scraps to a minimum. The center hot pink/reddish you will need a 2 1/2 inch square. I tried to measure out the background pieces and cut them more than 3 by 4 1/2 and found they were too small. I recommend cutting a 5 inch strip and then use that piece to sew your background quadrants.
There are no written instructions this week. Only a PDF printable download to get you the foundation paper. You will need to print this off twice (because existing stuff I am finding in EQ8, is not the best for pattern using….lesson learned).
You will need to set your stitch length to about 2 to 2.2 which will help you split your papers and perforated them for easy tears when removing.
Another tip I have learned in my quilting life, is to fold the 1/4 inch seam of the papers out of the way when joining your sections. This will make for much less tearing, and even easier paper removal.
And please be patient with yourself. If you are not accustomed to using foundation paper, there is a learning curve. My video editing had many edits, because I do not have enough practice. My normal quilter logic has flaws in that regard! Perhaps sew one up out of other fabrics to get the hang of it if you want a perfect block, and by the time you arrive at the second block, everything will be fresh in your mind and that block will turn out more perfectly than your first.
This file is color coded, so if you have a color printer that may help you out. I do not have a color printer so my tutorial for the paper will be in gray scale.
And if you have arrived to watch and see photos/content for the rag jacket make, please visit my previous blog posts here and there.
Hello readers! Thank you for stopping in or stopping by! This is a quick post on my latest make. This will have a part 3, so be on the lookout for that in a couple of weeks. This jacket is coming together lovely, and the fabric I have chosen has me walking on cloud nine! I am thrilled how this is turning out.
If you are here for the No Name Yet Quilt Along, you are in the right place. I have not made my post yet for the weekend, so hang tight. You can always bookmark and watch for a new block to post here.
If you are interested in making a jacket, such as this, be sure to check out my video playlist. But here is my latest video, showing how to make the sleeves.
I am currently editing and getting the video ready for the next block in the quilt along. It is going to be foundation paper pieced. Be on the look out for that to post in the next 24 hours.
For those of you who are here for the quilt along. The current quilt along link that will get you all the blocks can be found here.
If you are here for the previous quilt along please click here for all the blocks Scrappy Churn Dash QAL
For a quilters coat, which is very beginner friendly you will need basic sewing knowledge as well as:
An over sized sweatshirt (mine was one size up)
3 yds fabric (for adult plus size – more fabric if you want your fringe very dense)
new cone of thread (this is going to use up the thread
scissors (no rotary cutter or mat necessary)
sewing machine that will sew knit fabric (any machine made past 1990 should be able to sew this).
new needle (you may need to get a red ball point needle). Verify on a scrap piece of stretch fabric that your machine and a universal needle will not give you problems
You will need a good hunk of time
This is a monotonous project, so getting to the finish line may bore you.
No garment sewing knowledge required
First step will be to take your sweat shirt and split it down the middle. Finding the middle on a larger sweatshirt can be tricky. I found matching shoulders and folding sweatshirt in half and then splitting open with a scissors worked best for me. This will be the front of your coat, so take care to not cut crooked.
Another note to say, it might be a good idea to have your sweatshirt (which is your base for your coat) to match the fabric you select for the warmth. This is optional. I have made these with a match and an unmatched sweatshirt. Both ways will be phenomenal.
Next take your fabric, no need to cut it into any size, but you will now make your strips but cutting about 1 1/2 to 2 inches parallel to the selvedge edge. (I will have a full blown tutorial of this, this is just my introduction) Because we are cutting with the grain, you will just need to cut into the fabric about 2 inches. The rest will rip perfectly with the grain of fabric. You can opt to to this from selvedge edge to selvedge edge, but you will end up with a bunch more fraying when it is washed a dried, which takes away from the natural curl and lay of the fringe on the jacket. (Again more in a later post)
Here is the fabric I have selected. This is gorgeous in solids or prints. My last jacket was with bottle cap fabric from Tim Holtz. I will be retiring my 8 year old jacket because my sweatshirt (100% cotton) did not out last the quilters cotton.
I usually opt to just do a few strips at a time to keep my sewing area cleared of too much clutter. Doing all the strips at once may take you 5 minutes total. Notice all the strings that have shredded from the fabric strips? This is good and normal. You can simply just pull on those to remove them. More post of this sew coming soon.
All you do is layout your strip at the bottom of the jacket, but sew down the top raw edge. After sewing a row, snip every inch or 2. You can totally make your snips random. Just make sure you do not accidentally snip the sweatshirt base. And also do not work about sewing exact parallel lines. I am doing this buy eye. You could certainly use a walking foot with guide to keep straight. But warning, sweatshirts may not be correctly sewn in the first place, so no need to put to much emphasis on perfection.
You can stagger your snips, or you can do this as stacked like I am doing. Either way you will get the same affect. This jacket is magic and is so fluid after it is completed. If there is the slightest breeze, your coat will flutter and sparkle. I will have more tutorials on my YouTube channel so stay tuned to that playlist.