
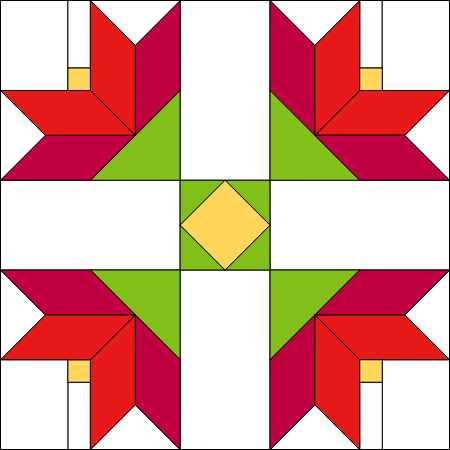
Today is the start of a new pattern for me. Today I am going to publish the templates with a few instruction here on the blog to keep you going, and to keep me going LOL. This block will require you to set a good bit of time aside to accomplish. There are 49 pieces! And Y seams! I am hoping in the previous videos I have made you have learned a great deal on Y seams, you got this!

First thing you will do, is print off the templates. You will ensure that piece J measures 1 3/8. You WILL be using the templates for this including the rectangles. They are very funny measurements that may not be on your ruler. The color way for this block is two different reds, a gold, some green, and background.
And here are the EQ8 cutting instructions if you chose you would like to use that to help you out.
Quantities as well as the colors are all called out in the cutting instruction.

Yes, I used the templates for all the pieces above as well as directly below.

So for piece D and E you will cut both of your different color of reds. Make sure to knock off the notches on the corners, this will save you when you are sewing this.
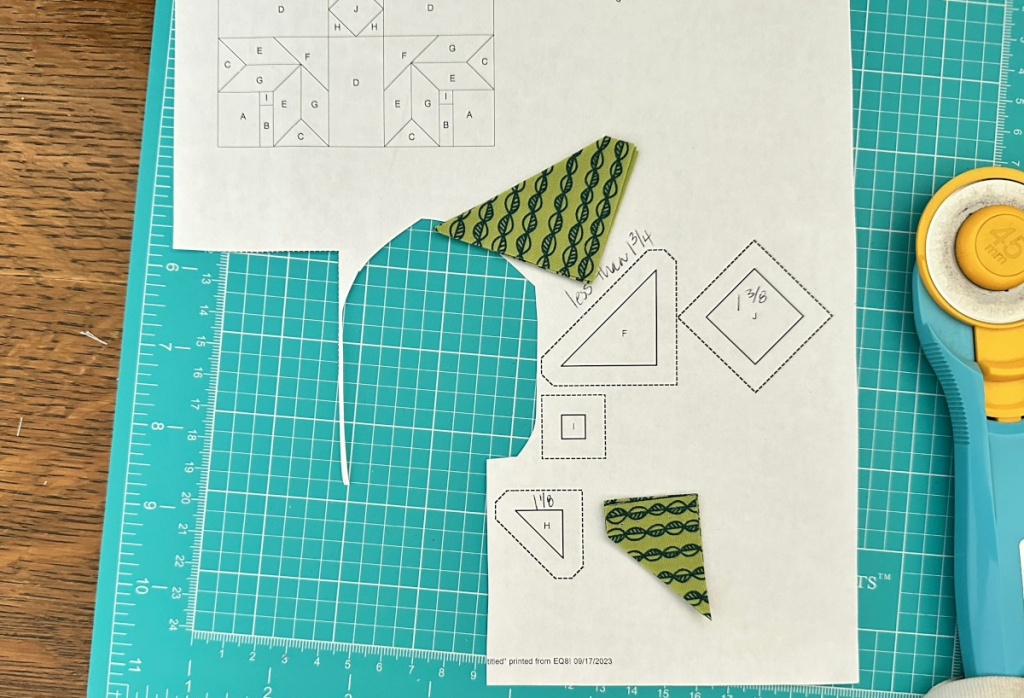
You can cut piece H using a 1 1/8 inch strip and subcut using your easy angle ruler, but your easy angle ruler does not have a 1 1/8 mark, so it might be best to use the template for that one. For piece F the larger hst, the paper doll measures just under 1 3/4. I went ahead and cut mine at 1 3/4 strip and subcut with the easy angle. This piece/corner, is where we will be trimming off excess anyway. Piece J square you can actually cut using your regular rotary cutter at 1 3/8.

For quanties, you can always look in the legend of your template sheet and count the Js and Is. These are cut from gold.

Pieces H and J are used here. I recommend when you sew this, you fold these pieces in half and mark the center and align the centers. I also recommend you press towards the green. I tiny economy block!

Sew opposing sides first, then trim and repeat.


Now here is the tricky part, your economy block is going to be a weird dimension. It will be the same width as Piece D. Center piece D onto your economy block and trim right to left and up to down. This will get you a square the same measurement as piece D which is the mating piece in the block.


Sew piece I to piece B. Make 4

Now sew piece I/B to piece A
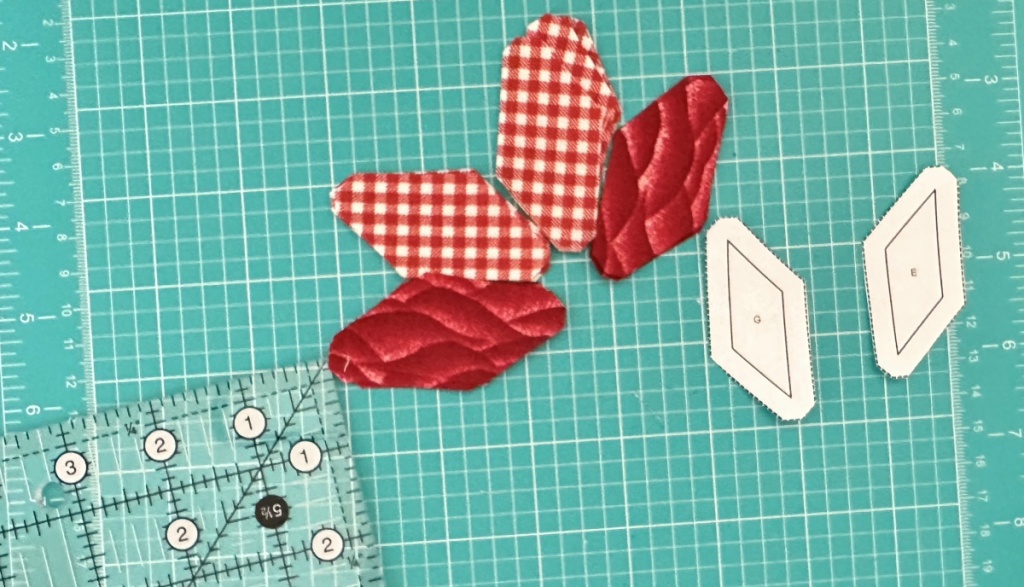
And now we jump to Y seams. Layout piece E and G like so.
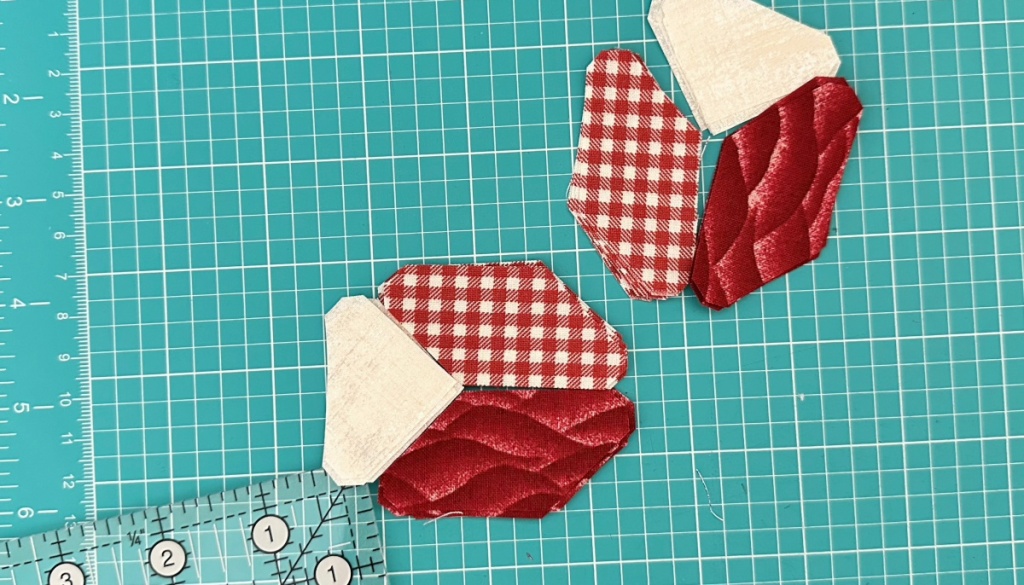
Here I have placed piece C background. You can achieve this in any order. Here is the order I did mine. Special note, because these are Y seams you need to start and stop at the 1/4 mark where all these seams meet.

I started by sewing piece G to piece C. You will press towards the red but pressing is not important now, we will address that later.

Here is where the order does not matter, I chose to sew my two red pieces together, starting at the 1/4 inch intersection. You may need to pop a stitch if you sew too much. It is far easier to pop a stitch than to put another stitch in.

Here I have folded away the reds and proceeded with the last stitch from piece E to piece C. If I have done this correctly, these pieces will open up without thread showing and will not have any puckers.

I have the right most piece turned wrong side up so you can see how I pressed these. Open your red seams and keep your triangle shape when pressing. If you do this any other way, it will go wonky.

Now for the last Y seam. I chose to sew my background block to the petals of the red fabric first. You can do this in any order. Make sure to stop and start 1/4 inch where everything comes together.

Here I have both sides of the petals sewn to the background block. Notice the bottom block, the reds are not yet sewn together. That is the next step.

When you do this step everything gets folded out of the way and out of sight. The seam sewn in this is the short side of the red. Again start and stop guarding that 1/4 measurement right at the junction. If you have done this right, your mirror images will be perfectly aligned like in the photo above.

Again press the red open and keep the back ground square pressed like a square. Yay! Y seams are done.

I recommend folding your green triangle piece F in half to find the center. Align the center of piece F to the flower center seam.
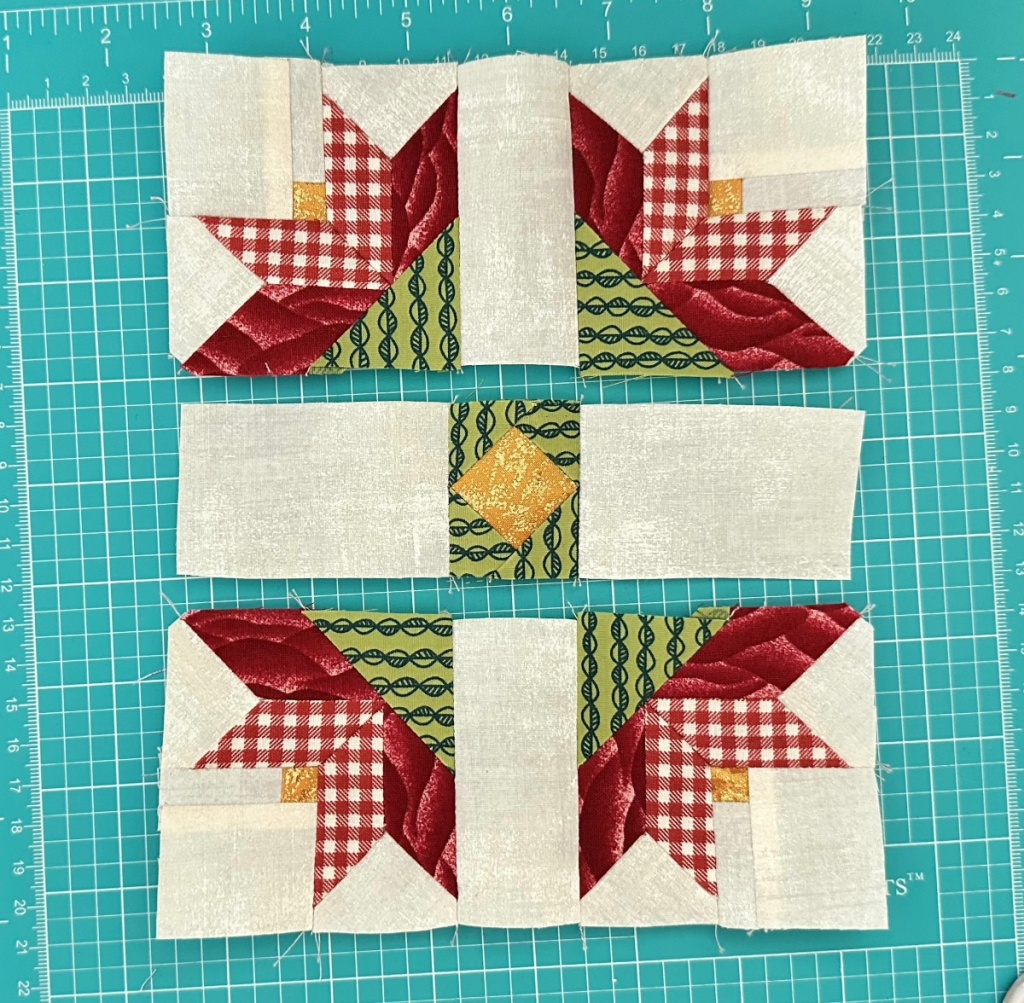
Before sewing your sashing in this block you will need to trim your flower blocks. They will measure the same length as piece D. If they do not, you will need to trim down your flower blocks. So you do not lose any points trim your blocks down on both green sides. Trim these to be 2 7/8 square. Do NOT square up the background corner. The background corner may be a tad wonky, but you have put a bunch of work into this block, you do not want to lose your points now. Proceed with making your 9 patch. Press this as you wish.

My block is not perfect, but it sure is pretty. This was a hard make. For those of you doing this one, Kudos for trying, Kudos for finishing. This one is really something. You will always remember the struggles when you gaze upon your finished quilt one day.
Thanks for stopping by and reading my blog!
