Hello my peoples, I hope as you are reading this, you are well and all is good! Getting back to the quilt along and this block’s components are not weird measurements, yay!
The quilt sampler has this modeled in green, white, and yellow, but you can change things up.
Here is the PDF download templates. When you print this off, the largest HST is going to measure 3 1/2 inches. I used my easy angle ruler with this and it went together easily.
And I used very bright colors for this, haha, I had fun with it!
And if this is the first time you are seeing my quilt along, hope on over to all the blocks page. As I post blocks I update the post so with a click of a button you can reach out and see, print, make each block. Please bookmark the page. Just in case I forget to put the link in the blogpost.
Well, I have a busy weekend ahead of me, so this post is brief. Thanks for understanding!
Hello friends! Today I bring you the Road to California Block with a variation. This block is not difficult but has many small pieces, so set aside time to make this one.
So most of this is 2 1/2 inch units. But, you will need to print off the templates because the 9 patch squares have a funny measurement that is not included on my ruler. If you have printed the templates the A square is 2 1/2 inches.
This block will also utilize your easy angle ruler by making 4 cuts with right sides together of the green and white. While this block has easy units to build, precision is key. After I made my 9 patches I ended up trimming them down to 2 1/2 inches. That funny measurement got me, and so my accuracy wained.
Here is how my block turned out.
I actually enjoyed making this block. I can again imagine a whole quilt full of scrappy blocks made using this block motif. And for those of you who are just learning of the free blocks in this quilt along, it is never too late to start. I am linking all my posts here, so all the blocks are in one place. Please bookmark this page incase I forget to link. And if you use my color way, here is what the quilt will look like at the end. This is a more advanced quilt build. The Chinese Checkers block with the black background and the block below it, as well as all the curved piecing are very advanced blocks. So, a little transparency if you start this project.
Please reach out and ask questions, I will try to get back to you quickly. And thank you for your support!
I am linking this block with the post that has all the blocks, you can find them all here. A shout out to everyone who has made it this far, you are 2/3rds done, woooohooooo! Thanks for stopping by and reading my blog.
Hello my peoples! It has been a flurry of scraps this past month. I will recap and show a new scrappy project debut. (Actually since I failed to post last month, this is from the past two months). First, you may notice I have rebranded the blog. I may change my format all together, but the logo is new. I was going for scrappy and it turned out to look like the old MTV scrappy LOL. Let me know what you think.
This post has me thinking about the definition of scrap and I have determined that a scrap (to me) is anything that is fabric except if you have a bolt of fabric. Every bit of this fabric was once part of a bolt. Regardless if it was yardage as in the rail fence above which is one yard of each color, or if it was nitty gritty scraps of reds and blues in the patriotic flag quilt. I am slowly using up my bits and bobs of fabric and after doing a search for a specific color last week realized that my yardage pieces of one yard or greater is quite diminished. My fat quarter drawer had so much room in it, it is now a dual drawer of neutrals with the fat quarters. My Kaffe drawer is full, but it is full of much smaller pieces. My tub of large yardage size pieces has even become sparse. I have sewed up the stash to the point of replacement! This is exciting and terrifying. Why you ask? Well I know how much I had spent on that fabric previously. And Now, I know it will cost much much more!
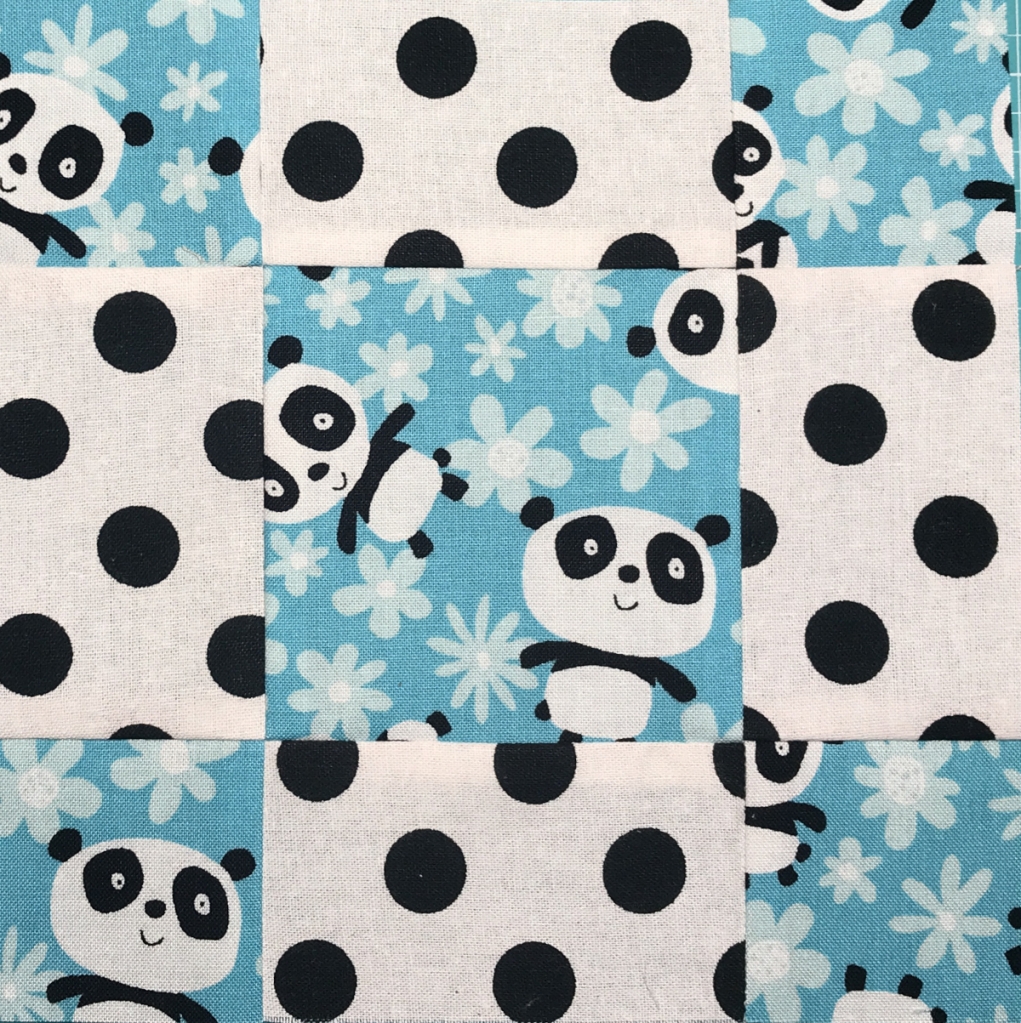
The quilt along blocks have started back up with regularity again (sorry for my delay on that). Here are a few you may not have seen, all made from the baggies of scraps I have. (The baggies are the ones that never seem to deplete themselves),
And remember for each of these blocks above, I am actually making 2 (which the secret will be revealed at the end of the QAL.) Again the secondary blocks are all made from scraps but totally different. If you are interested in the free patterns from these blocks make sure to check the link for all the blocks posted as of today. Another block is scheduled to post tomorrow. There are valuable paper templates that can be downloaded to help you with the cutting of the funny measurements.
Last weekend I saw an amazing scrappy project on youtube. Here is that video:
Laura Lynn put the cutting instructions in the description of the video. So, my thinking, I was needing to make a baby quilt for a little girl. And I new I had all the scraps necessary for the make. This was a quick project and turned out sew cute! I can’t wait to quilt this up and gift to the expecting parents.
I will say that I think the brown center measurement is off and should be 10 1/2 inches square. And yes, I turned one of the leaves wrong, but I doubt the parents nor the baby will even notice. And keeping the seam ripper at rest is delightful, lol!
Now onto the newest, most scrappy project. I do not know what I am going to call this? This is just some 4 patches with clever assignment of a couple neutrals here and there. I love this quilt pattern and the sparkle it gives my eye. Forgive me, I have not ironed a thing, I was in the throws of scraps flying and have procrastinated on ironing for the last couple of projects (sunflower too).
You can clearly see it is the same block over and over because they are not flat on the design wall. I dug into my 2 inch scrap tub and pulled out all the neutrals, blues, greens, and turquoise. The hardest part of this is the layout, very hard to lay this out because my eyes get lost and cannot find the pattern close up. I have to keep referring to my photo to figure out where I am going with placement.
This quilt is perfect for my scrap bins. This could also be made from my 1 1/2 inch bin and my 2 1/2 inch bin. I presume one day I will make this with reds and pinks and maybe orange.
Tilda fabrics has published a new pixelated pattern for an “embroidery quilt”. I placed a couple orders last week for fabric and got the whole shebang cut minus the background squares. ( I reckon I cut over 4500 squares for this in a matter of about 2 days) I used my slotted ruler by June Taylor which cut 80 squares of fabric in a matter of about 2 minutes. Faster than the accuquilt. I love this ruler, but it slips, so I may invest in the one that creative grids has. It can certainly turn a scrap pile into a bunch of squares very quickly.
My scrap piles still has many quilts to go, but I am using it up and when you use those little bits and bobs, it is very satisfying because it is like making a quilt with no cost. And that is most friendly to my economics these days!
Make sure to check out all the bloggers and their use of scraps in other ScrapHappy posts. Thank you Kate and Gun for keeping the scrappy ideas flowing for us all!
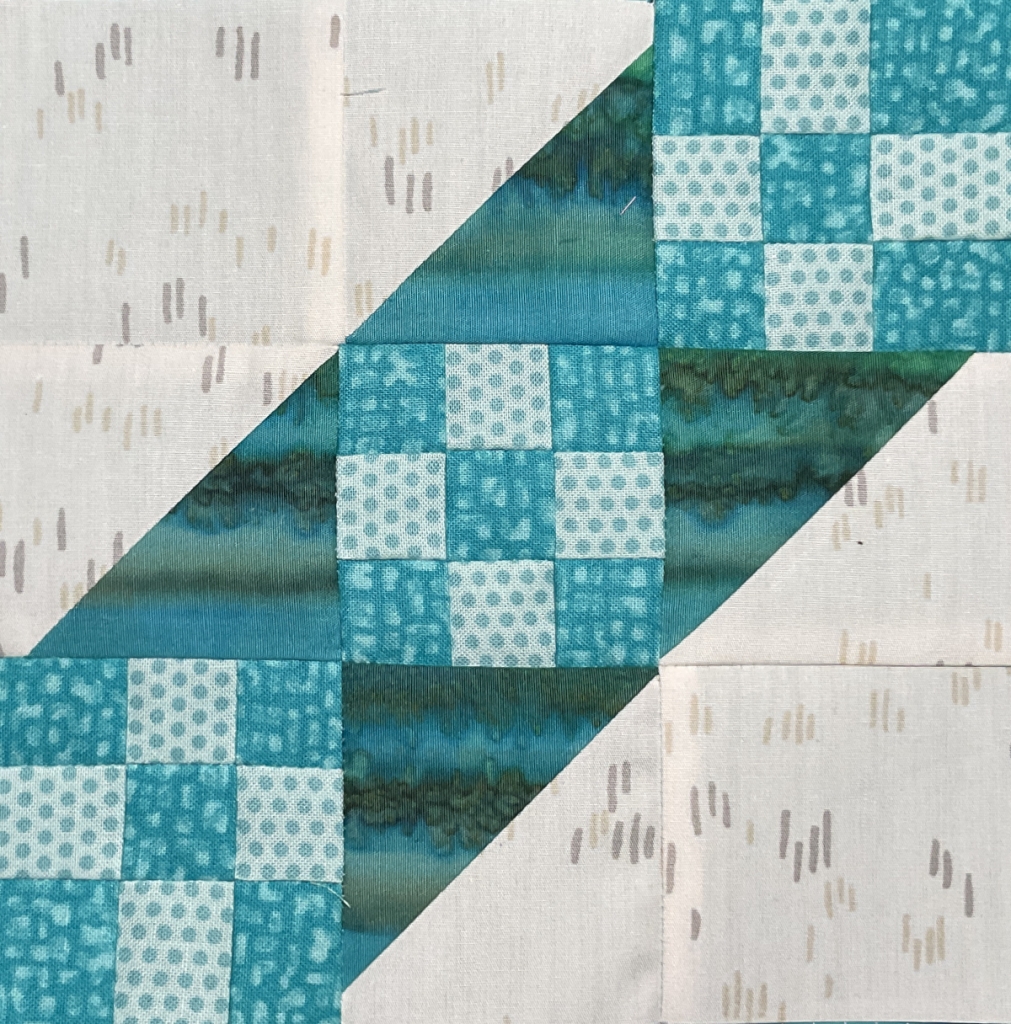
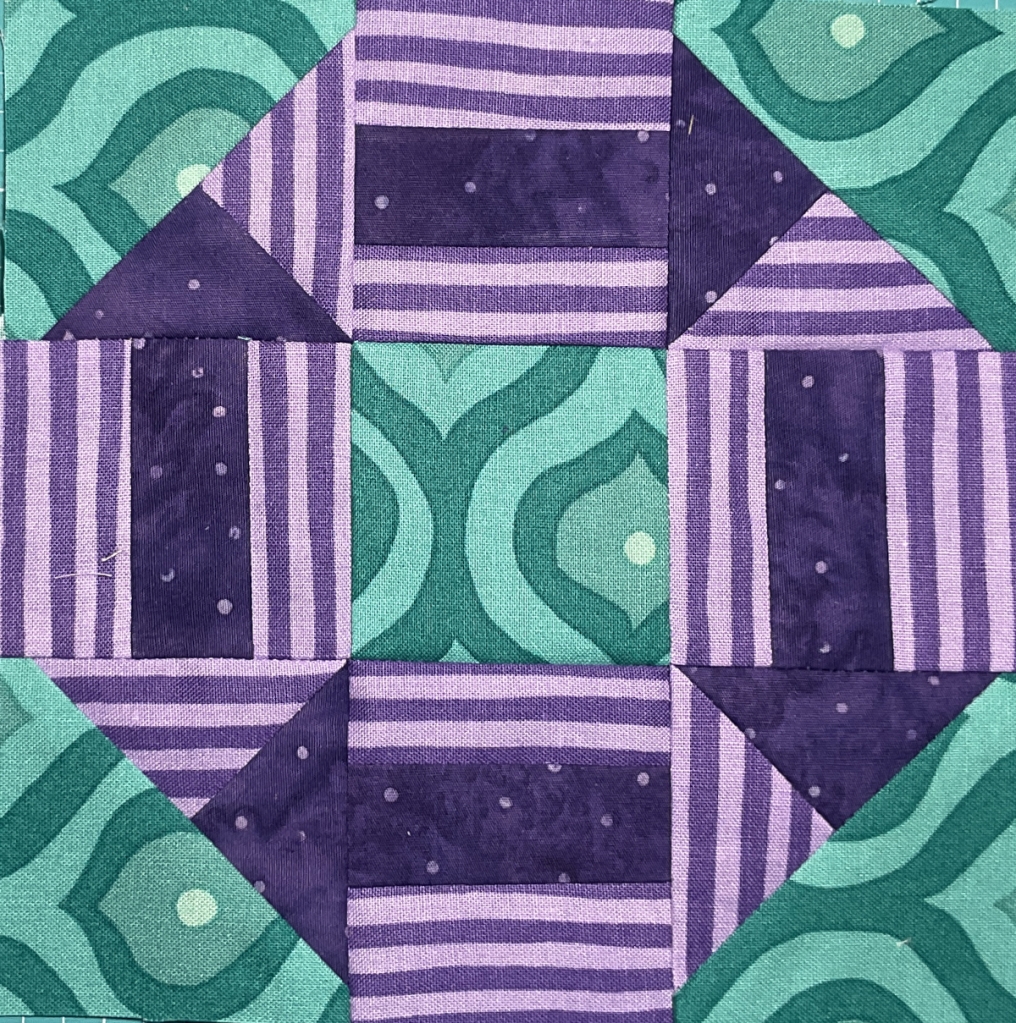
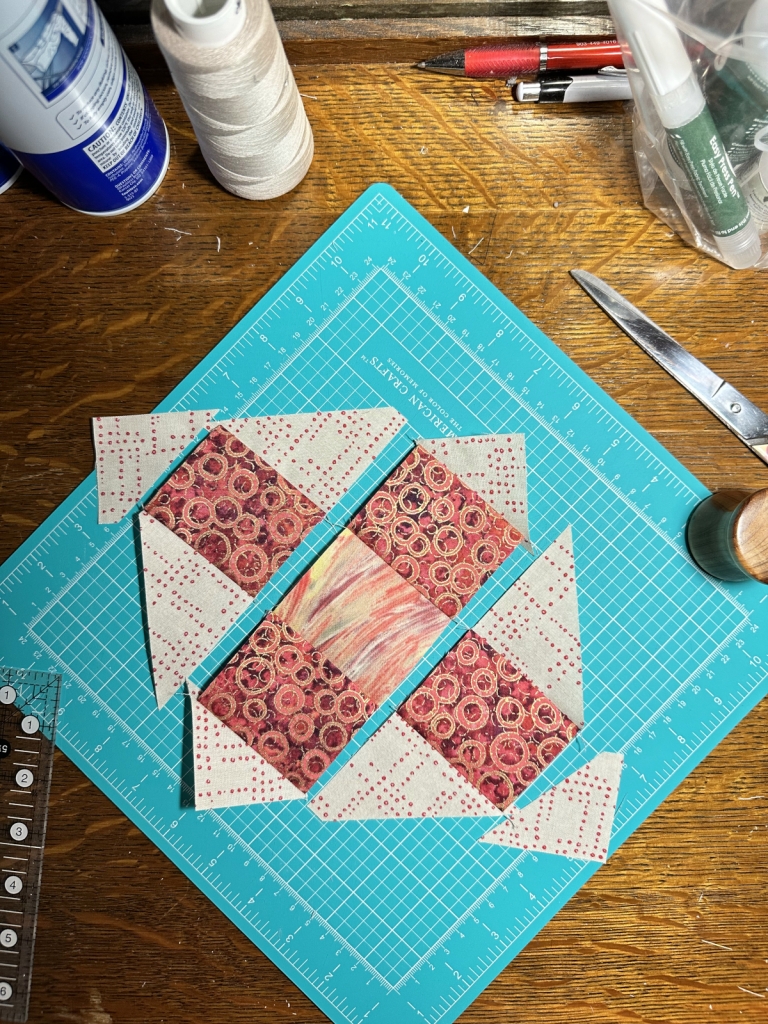
Hello quilting friends. Today’s quilting freebie is called London Roads. This block has a lot of pieces and the pieces are not your average ruler cut sizes. You will need to download the templates.
If you are following along with the color scheme of the pic below, this requires two shades of purple and a teal. As I was making this during our sit and sew, everyone commented how lovely these colors married together. I made my arrows go counterclockwise….ooops, but it has the same affect. Since this is a 9 patch all the squares/subunits are 2 1/2 inches. The small triangles in the corner are not quite cut using the easy angle ruler from a 2 inch strip. You could get away with cutting it that dimension and then trimming the excess off. The bars are the weird dimension. As long as you trim each of the squares after sewing, you will do fine!
Hello my lovelies! I hope this blog post finds you fine and dandy. Today’s block, as the title suggests is the Old Maid Puzzle quilt block. This block is an easy one. You will need your easy angle ruler for this. You can totally use the templates too. All the measurements are easy, yay!
For the neutral part of the large HST you will need to cut a 3 1/2 inch strip and then sub-cut using the easy angle ruler. Cut two. For the purple and blue HSTs you will need to cut a strip of purple and blue at 2 inches. With right sides together, cut 6 sets using the easy angle ruler. Additionally from a 2 inch strip cut the remaining blue triangles (qty 4) and cut 4 squares of blue at 2 inches.
Here are the templates for download. The measurements given above are the measurements of these templates.
Using the picture, layout your block sewing each quadrant. Start with the small HSTs. Trim to 2 inches, then make the 4 patch with the blue squares. With the two left over HSTs sew the triangles as pictured. Pair this with the large white HST. Trim to 3 1/2 inches. Now sew your 4 patch.
I could see a very nice scrappy quilt made with several of these blocks! Have fun with the color options. I used colors in the quilt diagram below, but you can be adventurous!
If you are just arriving at this quilt along, it is not too late to join in at any time. This is work at your own pace. Here is a link to all the blocks.
Have a great weekend and thanks for reading my blog!
But first, I am linking up with Yvonne @Quilting Jetgirl for Favorite May Finish. Head on over to see bloggers favorite finish for the month of May. Click here for those posts.
I am going to call this scrappy quilt done. Sorry, it is raining all week without a good up to date photo op. I just finished the binding, yay. This quilt and the center 9 patches were from a retreat I went to for vintage machines. All these were signed by the ladies who made the blocks. Additional information is where they were from and what make and model year machine they were stitched on. Those vintage machines have flawless stitch! I made each of those 9 patches into stars. Each of these quilters were superstars! The surrounding outer border is from my orphan 9 patches as well as great use of my 2 1/2 inch square bin. I will treasure the time I spent with these ladies at TOGA (treadle on gathering academy) and I will treasure this quilt for the rest of my life. A true keepsake!
This top was finished last weekend, it’s ready for quilting. And this too is made from scraps from one of my free designs, but more of a controlled scrappy. I need to shop my stash for a suitable backing.
And this rail fence I finished this weekend. Sometimes all the projects I have going get to a completion stage all at the same time. I love when that happens. This is a 3 yd quilt. Apologies, this is a quilt top now but I failed to snap a photo. It is now offsite at the longarm. Next inline to be quilted.
I have quilted a quilt for mom. This is called Walk About. Mom used a marriage of beautiful fabrics!
And this quilt had a bit of drama at the finish line. Long story short, Mom received a large assortment of fabric, notions, batting from a quilter who passed. In that assortment was this marbled burgundy wide back. I did not measure the wide back but assumed it was a tad less than 120 x 120 due to prewashing. I always load my backings with the selvage edge on my red snappers. Because I had so much extra hangover on the sides, I still assumed this was the standard wide back size. Neither Mom nor I measured. And that made a fool out of me! The wide back was only 90 wide and had been washed, so a good 4 to 5 inches of shrinkage. I ran out of backing! I have been doing this for a while now and feel horrible for my goof. So, I was using a pantograph, I advanced the quilt, locked down the machine head to resume and keep the pantograph inline and poor Mom had a bunch of hand stitching a strip of fabric in a very hot and humid garage to do. Irrelevant to that goof, this quilt turned out beautiful! That quilt will tell this story one day, but for now its secret is perfectly stitched silent. Oh and Because my batting is only 90 wide I had to frankenbat at the very end in a couple spots.
I am looking forward to getting back to the free quilt along which makes this quilt.
If any of you are interested, all the free block templates you can find them here. I am going to keep this free so visit when you can, but in case something happens to all this technology, you may want to download and print.
In summary, my favorite finish this month is the patriotic quilt! This screams picnic to me!
In Summary it has been another bumper crop of cotton this May! And thank you for reading my blog!
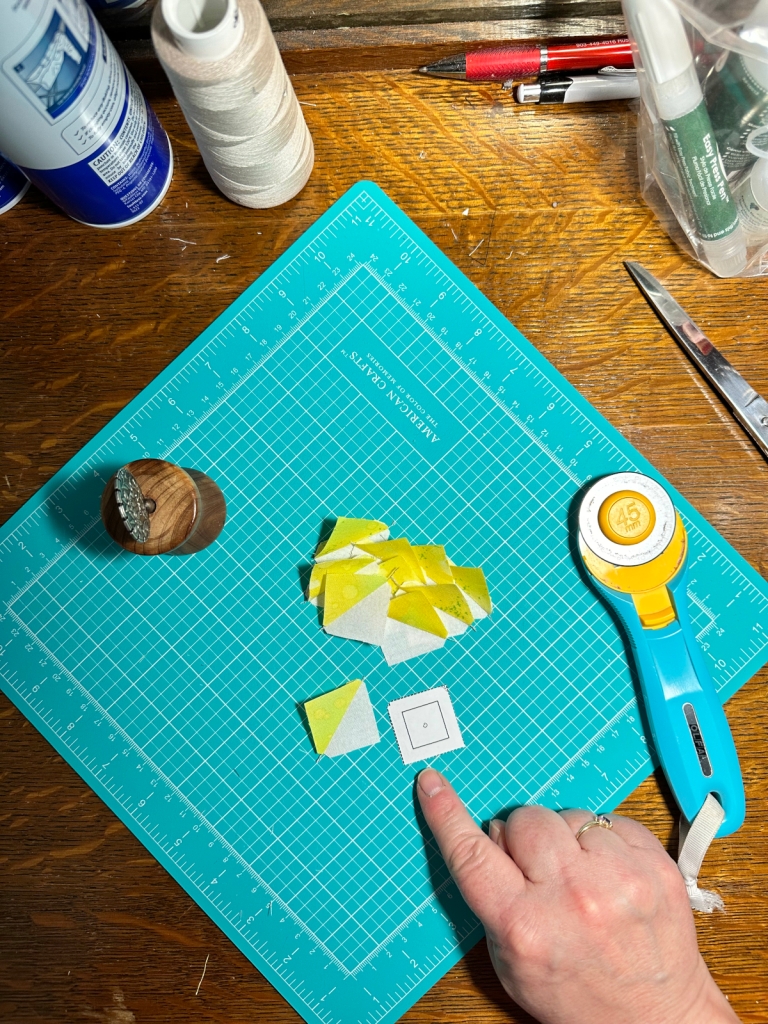
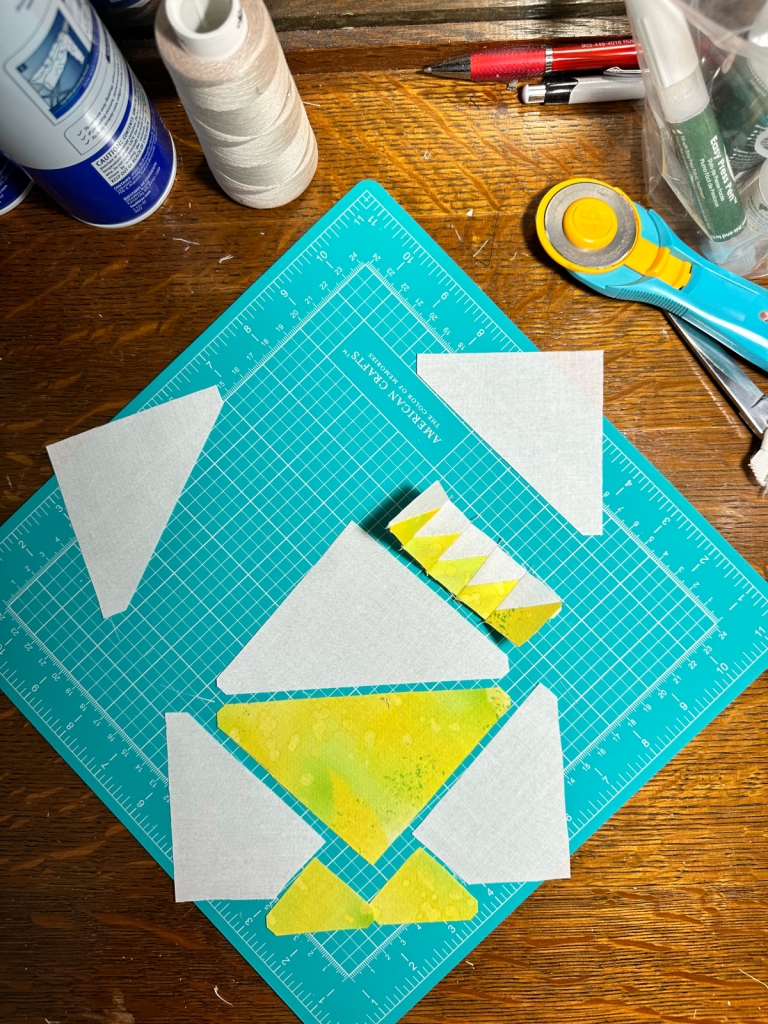
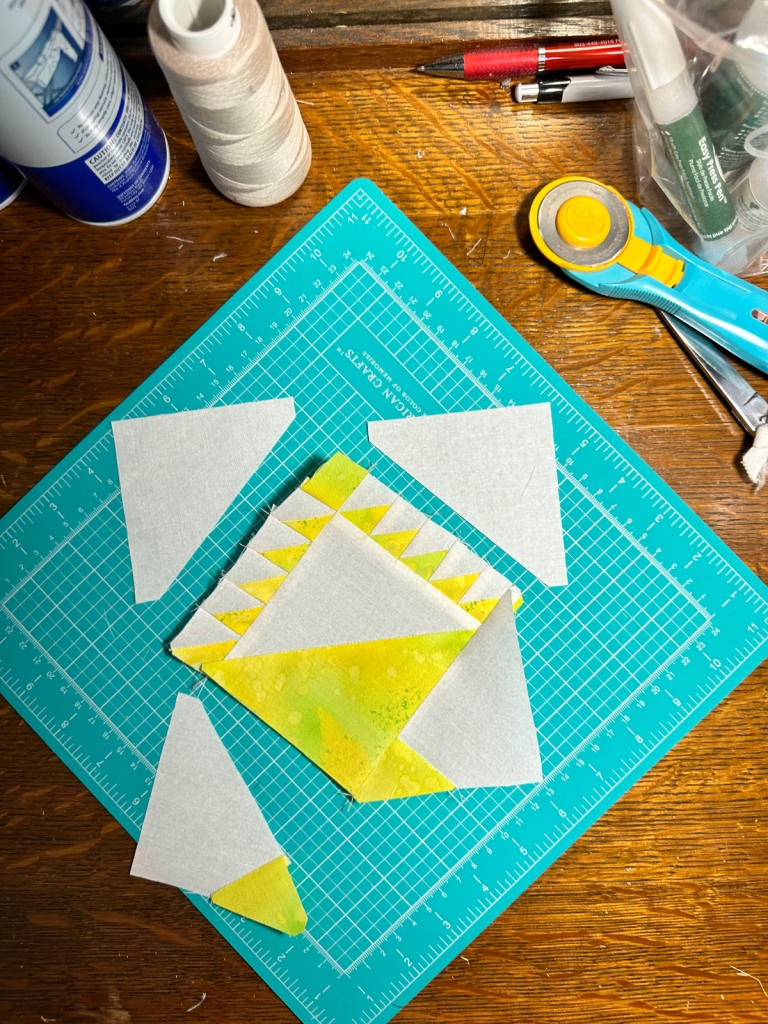
Well, it seems like eons since I posted a block for the quilt along! Sorry. Project management has become a problem. Today’s quilt along block is called Mosaic and it is an easy build!
Here are the templates. I highly recommend using those. But you could just get away with cutting those odd edge triangles as squares to start out with and then just have a bunch of fabric waste. Your quilt and fabric your rules.
Here is my block colors. Choose whatever you like. It looks like the main squares and the large half squares are 2 5/8. The small corner half squares are 2 inches.
Basically you sew your rows together in the block, trimming your dog ears along the way. And voilà!
Trim your block to 6 1/2 inches.
I am envisioning a large scrappy quilt full of these blocks. Oh the possibilities! Compared to what we have made for this quilt along, this one was a breeze! If you are curious to see all the blocks, or want the free block resource, make sure to check out that post here.
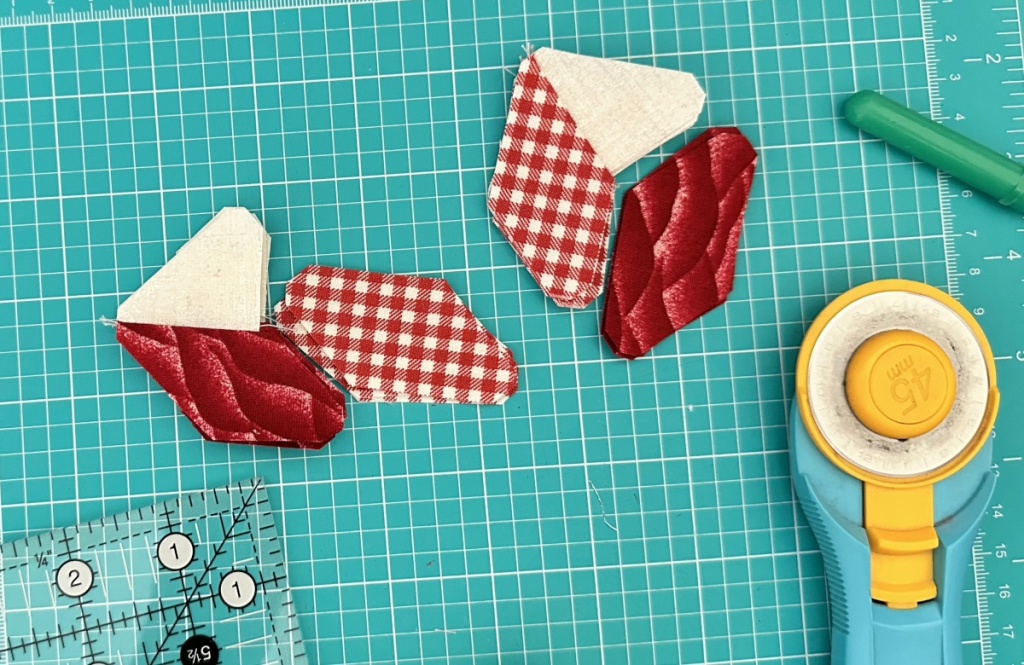
It has been a hot minute since my last post for the free pattern quilt along. Todays block is the fruit basket block. *disclaimer I done my block in the wrong colorway! Sometimes I just don’t have my thinking cap on.
Proceed in which ever colorway you like. I failed to do mine in the assigned color in the legend. But, I am not redoing it because this was pretty labor intensive.
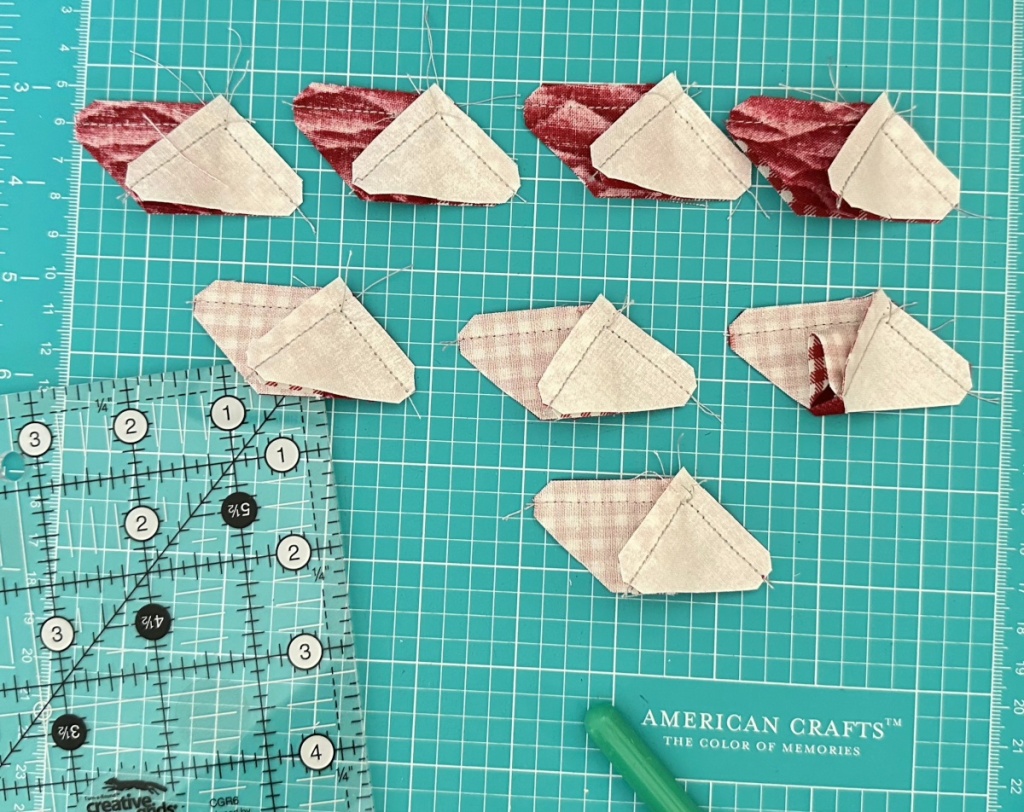
Step one download the templates. I would utilize all the templates. And yes, I have verified these are accurate. Step 2 cut out all your pieces. For reference I have written the sizes or approximate sizes on the pieces. Again, use the templates solely for this block.
Make your HSTs for the handle of the basket. These are a funny measurement.
Step 3 After making your HSTs it is necessary to use template G and trim them down to that weird size.
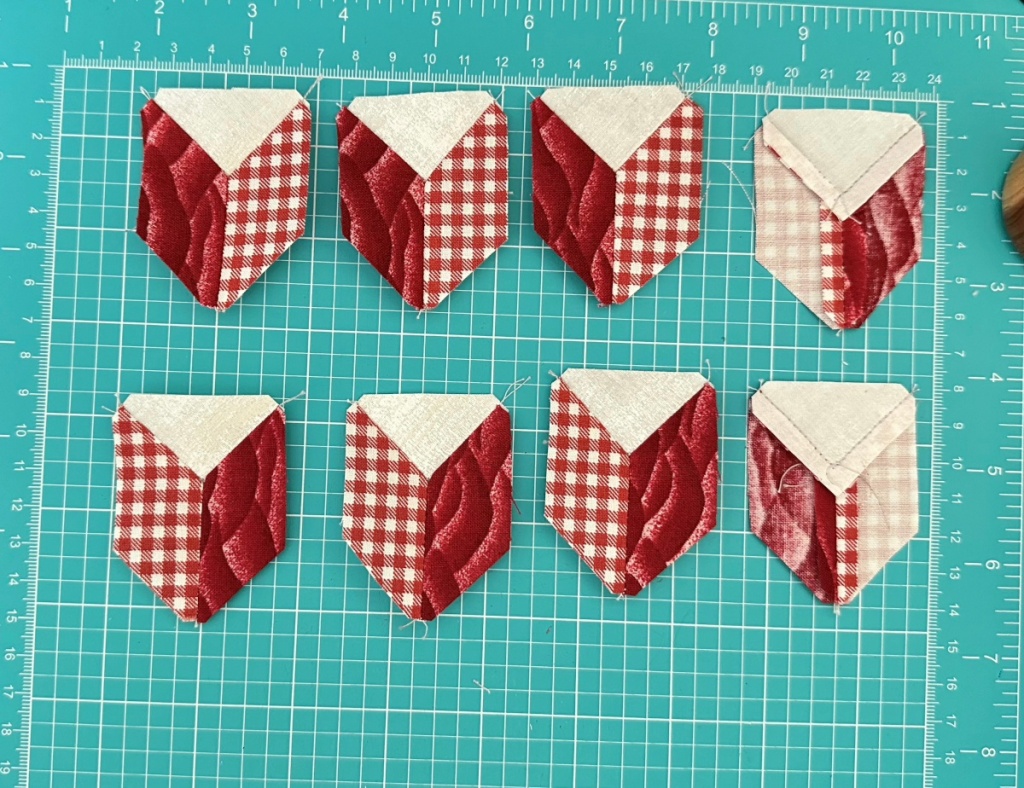
Step 4 Layout your pieces. The remaining steps I did, I probably would have changed up just a tad and sewn the center HST together before joining the handle. Follow the pictures step by step and sew your pieces.
And now just sew those remaining corners. This was pretty labor intensive but not hard.
Viola!
And for those of you who are here for the first time, you can go fetch all the blocks. Click this link to get to the rest of the quilt along free patterns/links.
Today is the start of a new pattern for me. Today I am going to publish the templates with a few instruction here on the blog to keep you going, and to keep me going LOL. This block will require you to set a good bit of time aside to accomplish. There are 49 pieces! And Y seams! I am hoping in the previous videos I have made you have learned a great deal on Y seams, you got this!
First thing you will do, is print off the templates. You will ensure that piece J measures 1 3/8. You WILL be using the templates for this including the rectangles. They are very funny measurements that may not be on your ruler. The color way for this block is two different reds, a gold, some green, and background.
Quantities as well as the colors are all called out in the cutting instruction.
Yes, I used the templates for all the pieces above as well as directly below.
So for piece D and E you will cut both of your different color of reds. Make sure to knock off the notches on the corners, this will save you when you are sewing this.
You can cut piece H using a 1 1/8 inch strip and subcut using your easy angle ruler, but your easy angle ruler does not have a 1 1/8 mark, so it might be best to use the template for that one. For piece F the larger hst, the paper doll measures just under 1 3/4. I went ahead and cut mine at 1 3/4 strip and subcut with the easy angle. This piece/corner, is where we will be trimming off excess anyway. Piece J square you can actually cut using your regular rotary cutter at 1 3/8.
For quanties, you can always look in the legend of your template sheet and count the Js and Is. These are cut from gold.
Pieces H and J are used here. I recommend when you sew this, you fold these pieces in half and mark the center and align the centers. I also recommend you press towards the green. I tiny economy block!
Sew opposing sides first, then trim and repeat.
Now here is the tricky part, your economy block is going to be a weird dimension. It will be the same width as Piece D. Center piece D onto your economy block and trim right to left and up to down. This will get you a square the same measurement as piece D which is the mating piece in the block.
Sew piece I to piece B. Make 4
Now sew piece I/B to piece A
And now we jump to Y seams. Layout piece E and G like so.
Here I have placed piece C background. You can achieve this in any order. Here is the order I did mine. Special note, because these are Y seams you need to start and stop at the 1/4 mark where all these seams meet.
I started by sewing piece G to piece C. You will press towards the red but pressing is not important now, we will address that later.
Here is where the order does not matter, I chose to sew my two red pieces together, starting at the 1/4 inch intersection. You may need to pop a stitch if you sew too much. It is far easier to pop a stitch than to put another stitch in.
Here I have folded away the reds and proceeded with the last stitch from piece E to piece C. If I have done this correctly, these pieces will open up without thread showing and will not have any puckers.
I have the right most piece turned wrong side up so you can see how I pressed these. Open your red seams and keep your triangle shape when pressing. If you do this any other way, it will go wonky.
Now for the last Y seam. I chose to sew my background block to the petals of the red fabric first. You can do this in any order. Make sure to stop and start 1/4 inch where everything comes together.
Here I have both sides of the petals sewn to the background block. Notice the bottom block, the reds are not yet sewn together. That is the next step.
When you do this step everything gets folded out of the way and out of sight. The seam sewn in this is the short side of the red. Again start and stop guarding that 1/4 measurement right at the junction. If you have done this right, your mirror images will be perfectly aligned like in the photo above.
Again press the red open and keep the back ground square pressed like a square. Yay! Y seams are done.
I recommend folding your green triangle piece F in half to find the center. Align the center of piece F to the flower center seam.
Before sewing your sashing in this block you will need to trim your flower blocks. They will measure the same length as piece D. If they do not, you will need to trim down your flower blocks. So you do not lose any points trim your blocks down on both green sides. Trim these to be 2 7/8 square. Do NOT square up the background corner. The background corner may be a tad wonky, but you have put a bunch of work into this block, you do not want to lose your points now. Proceed with making your 9 patch. Press this as you wish.
My block is not perfect, but it sure is pretty. This was a hard make. For those of you doing this one, Kudos for trying, Kudos for finishing. This one is really something. You will always remember the struggles when you gaze upon your finished quilt one day.